This guided series of tutorials will walk you through the basics of getting started with Scriptworks for your mobile Test Automation with Android Emulators on Windows.
In this article, we will set up our windows machine with an Android Emulator and use the inspection tool of Scriptworks. You might like to read our guide on Mobile App Testing to get a clear understanding of the topic before getting hands-on.
Let’s follow a step by step procedure.
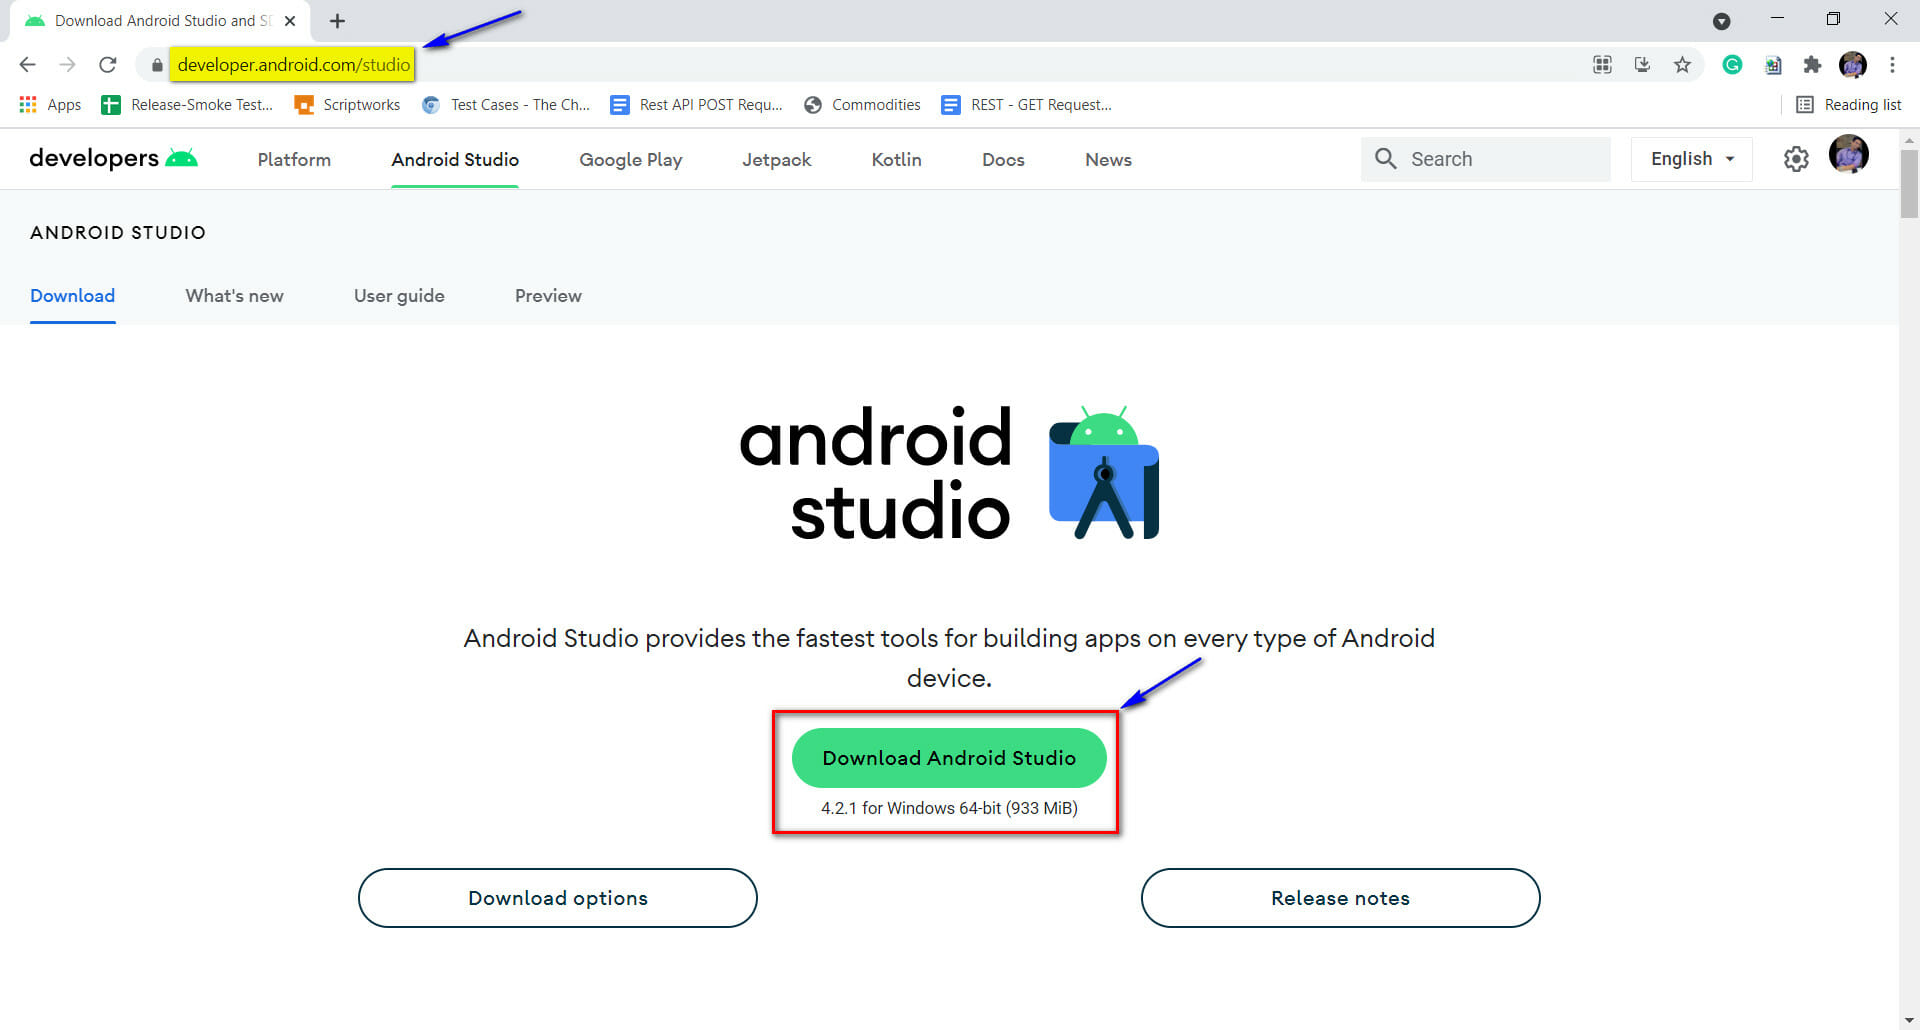
1) First, Install Android Studio on your Windows Machine.
For that, navigate to https://developer.android.com/studio and click on Download Android Studio.
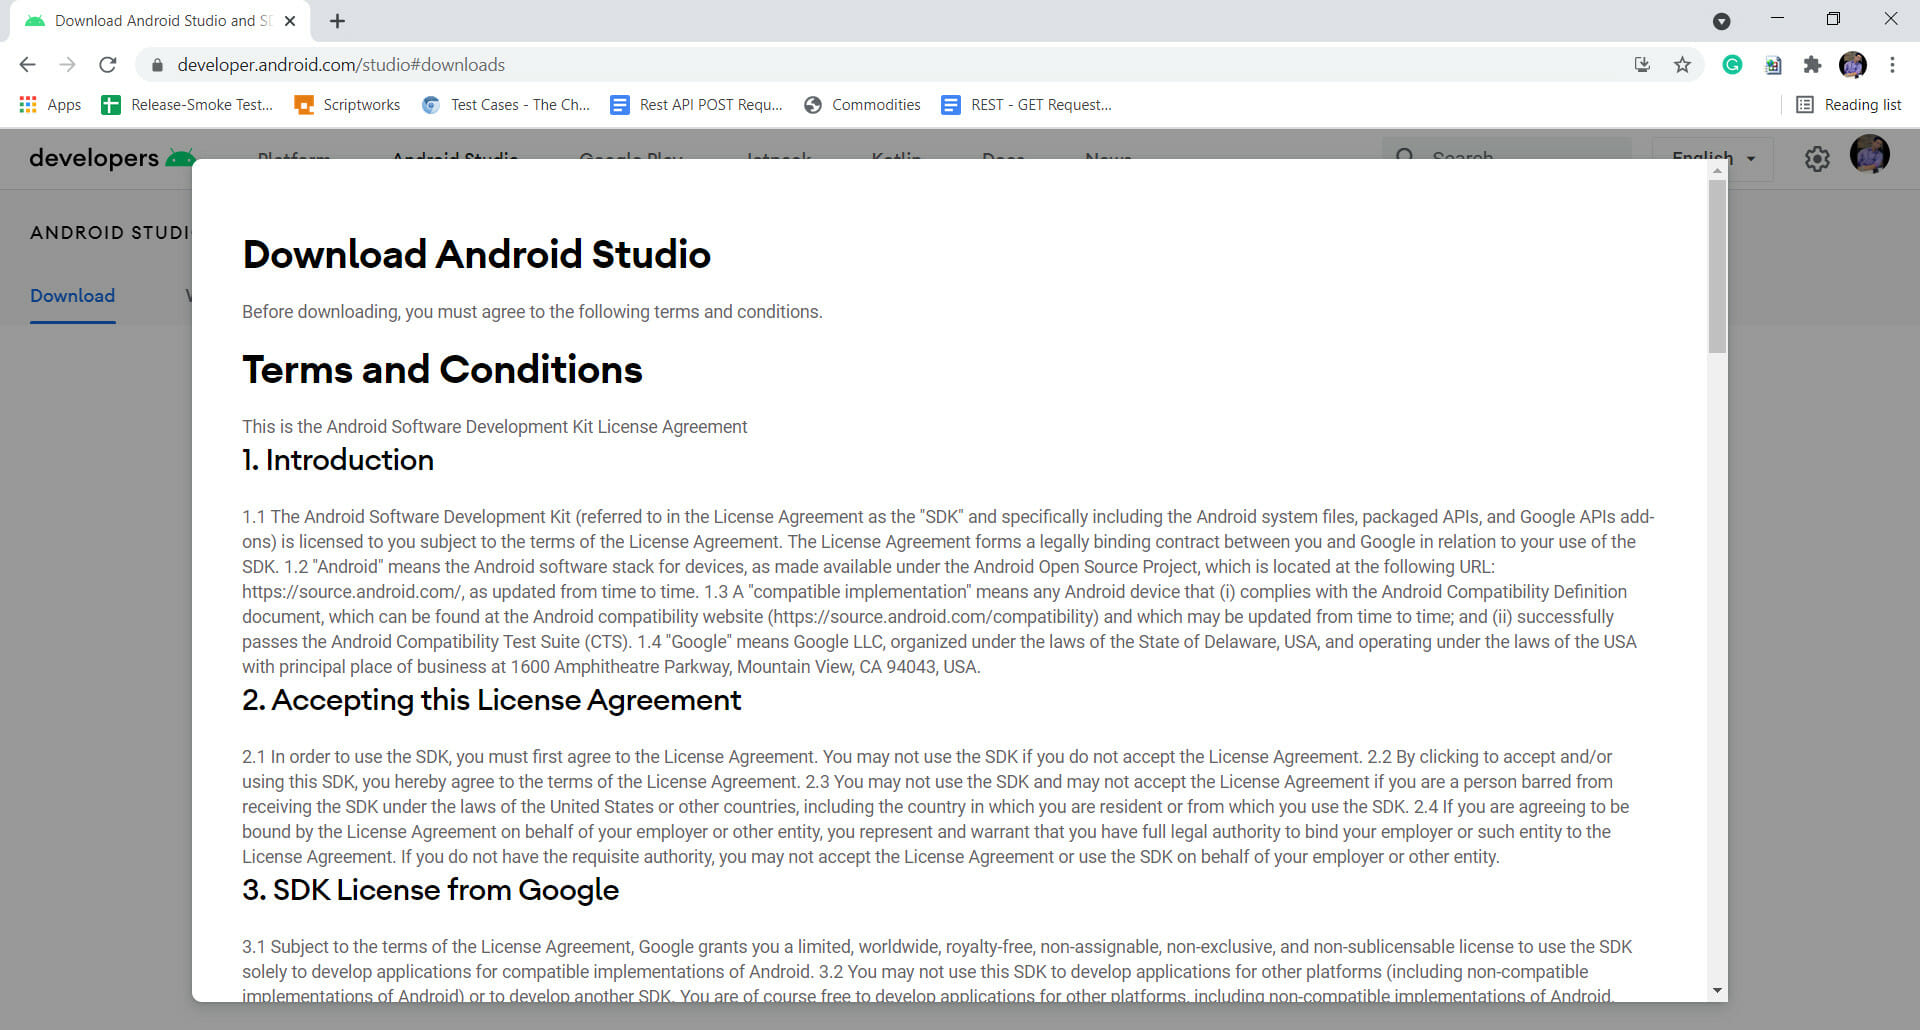
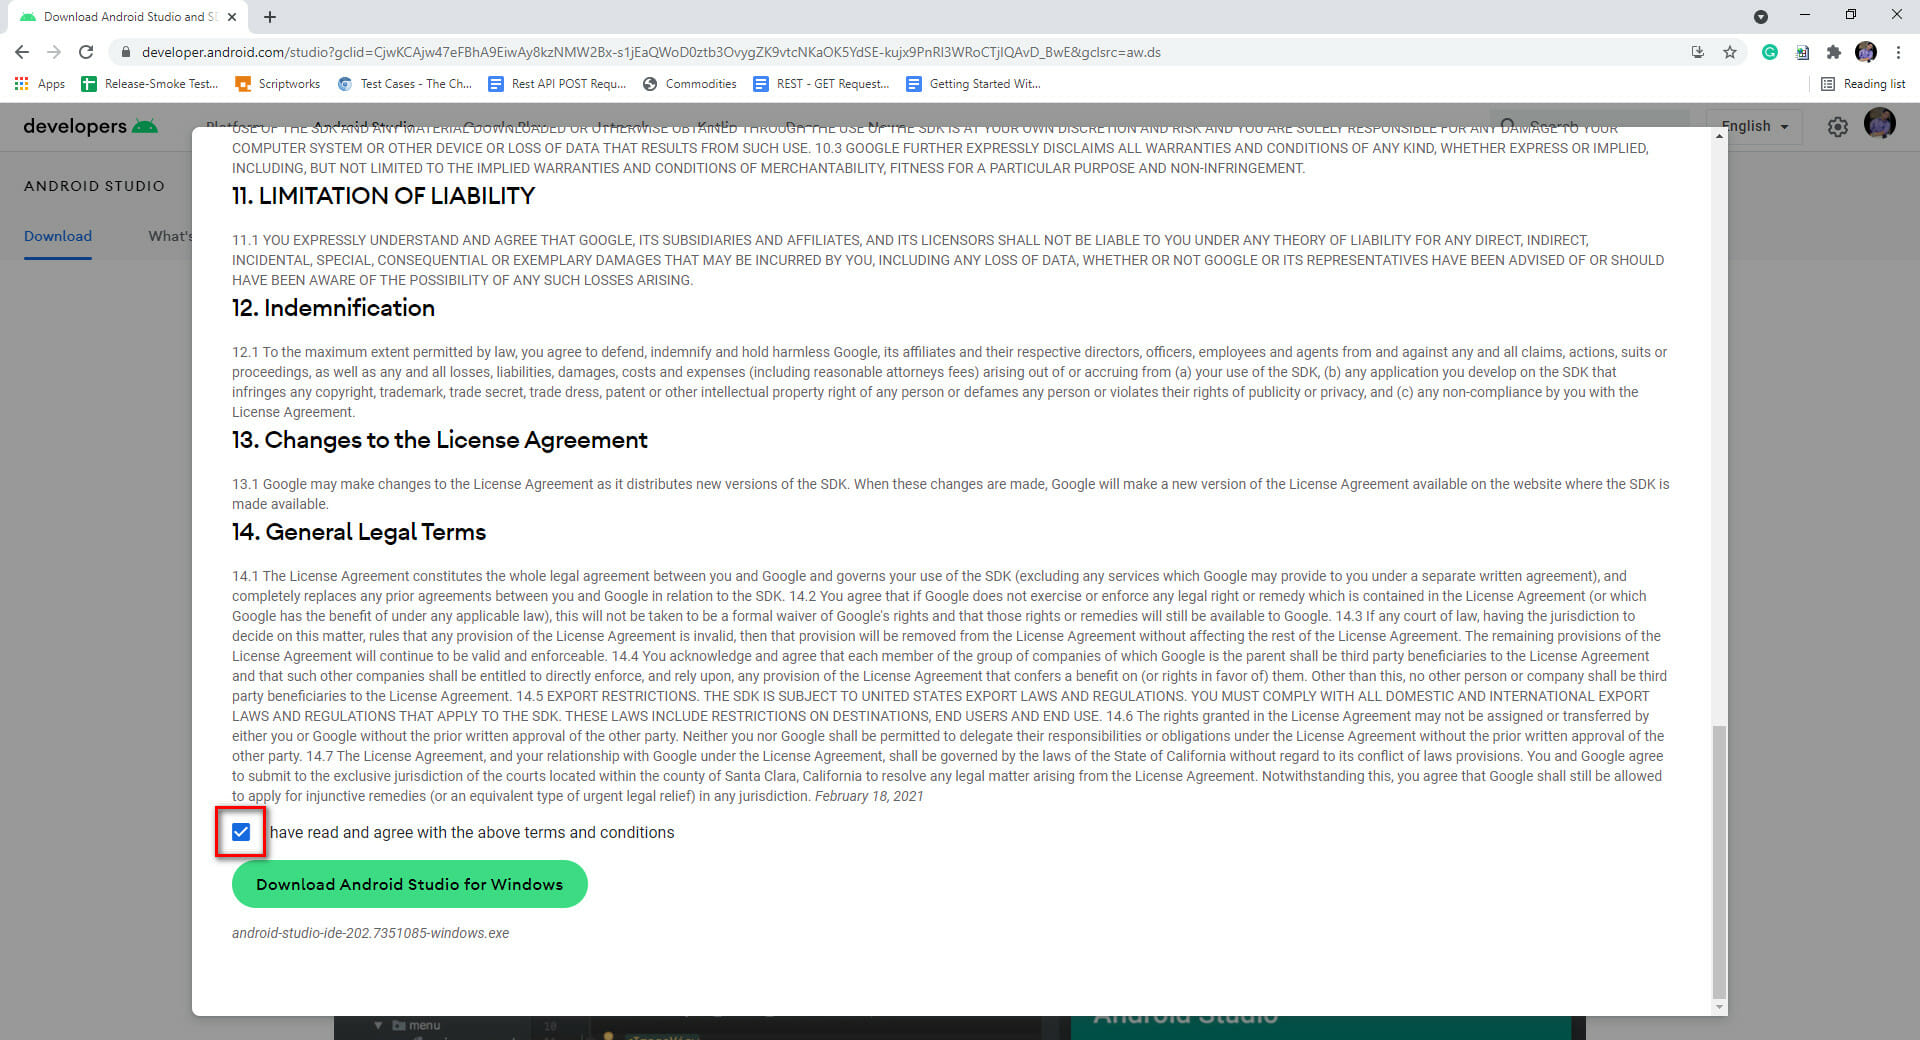
2) Accept the terms and conditions by marking the checkbox and click on Download Android Studio for Windows Button.
3) Double Click on the Downloaded .exe (executable file) to start the installation process.
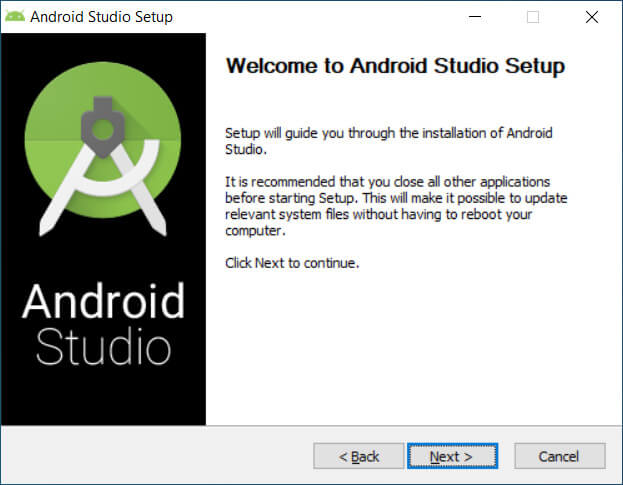
Click on the Next Button.
Click on the Next Button.
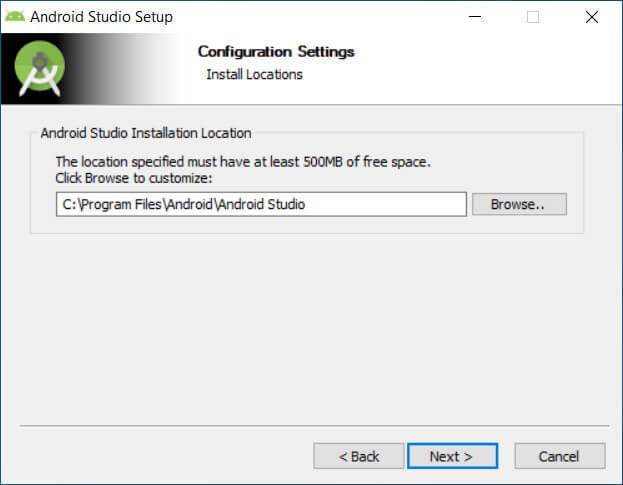
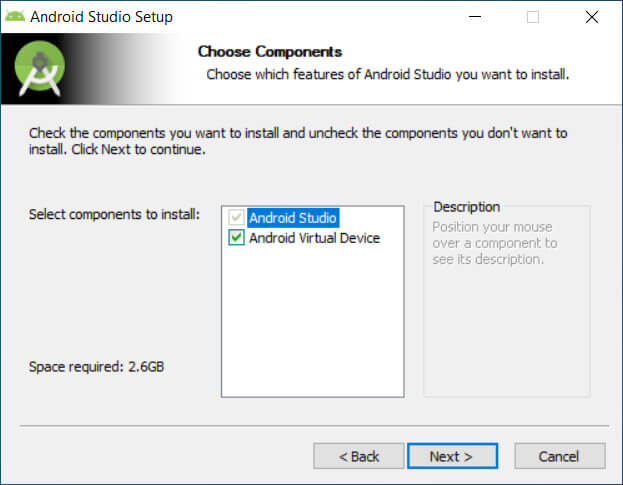
Click on the Next Button.
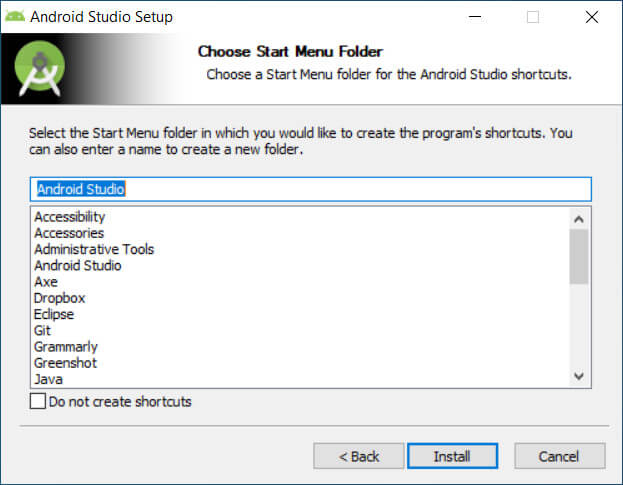
Click on the Install Button.
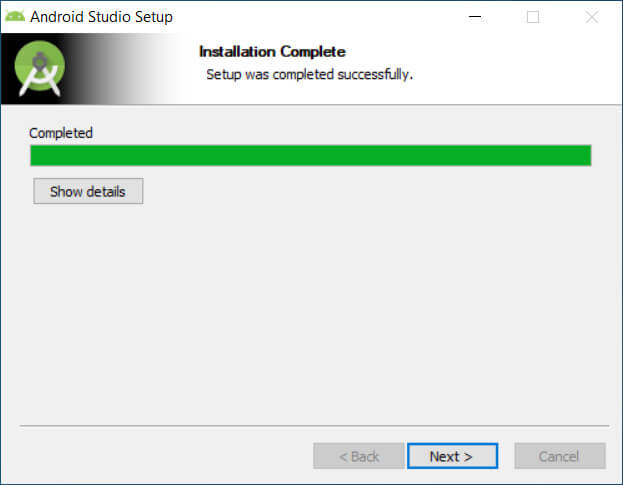
Click on the Next Button
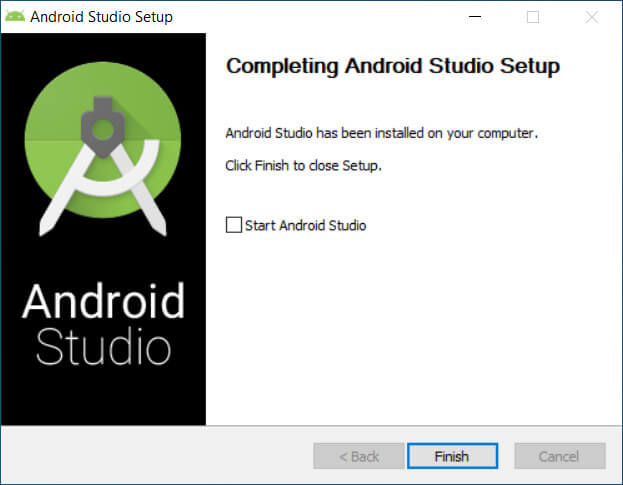
Uncheck the Start Android Studio Check box and click on Finish Button.
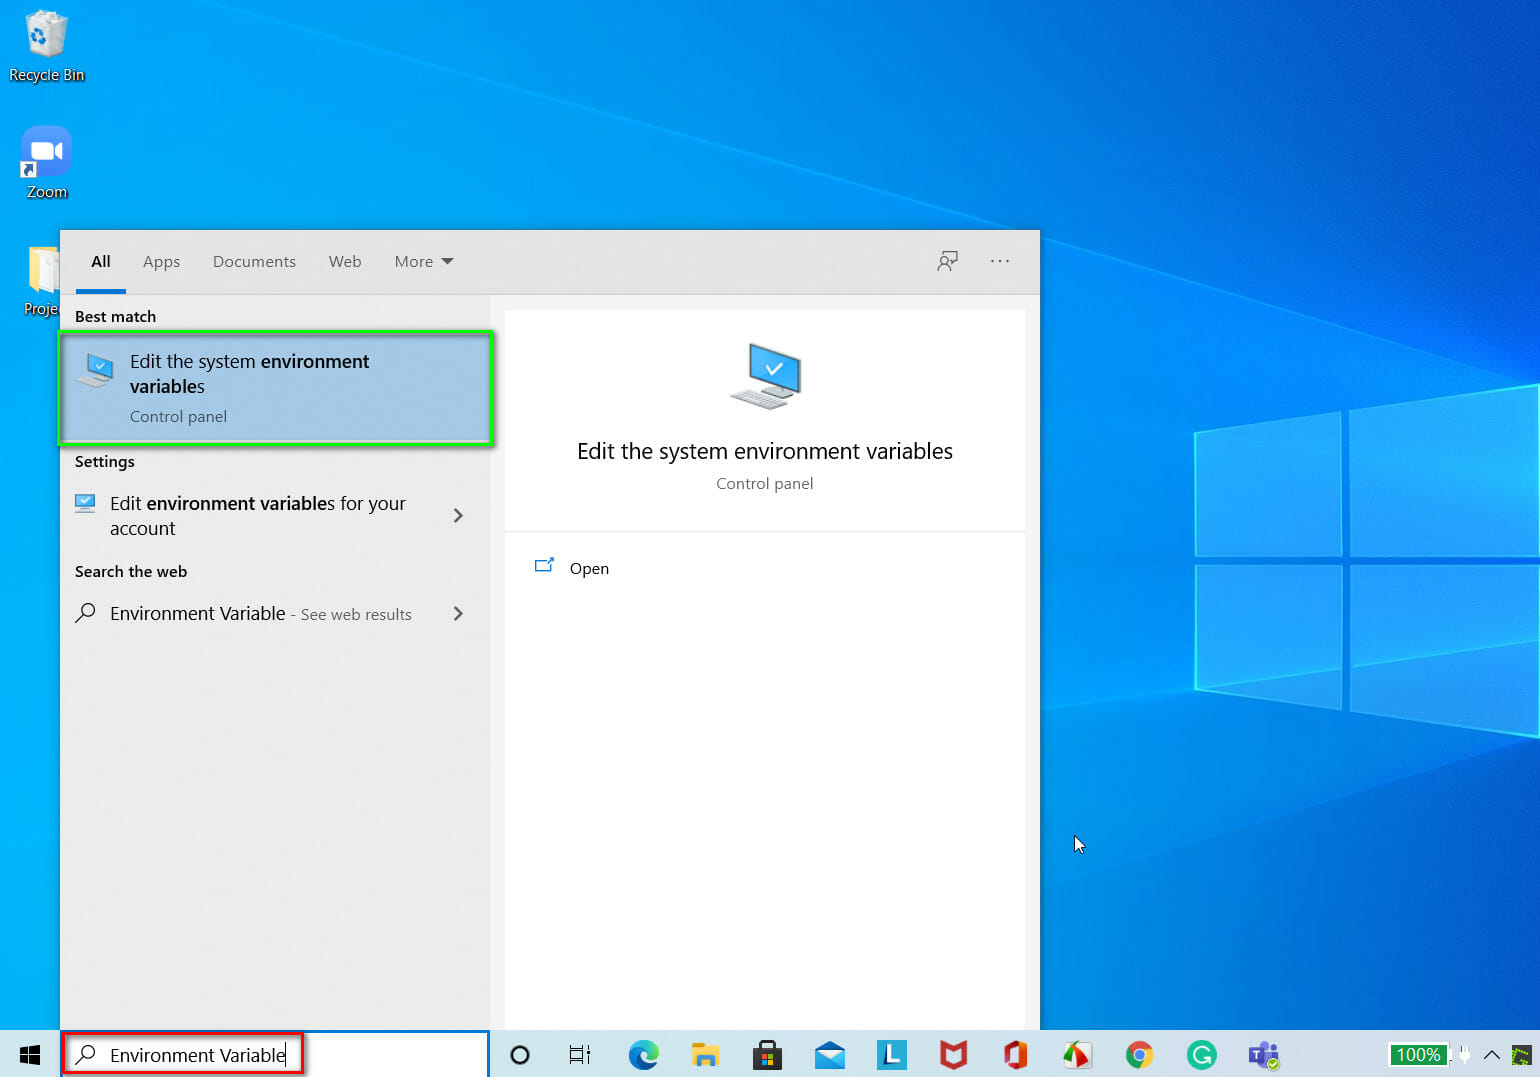
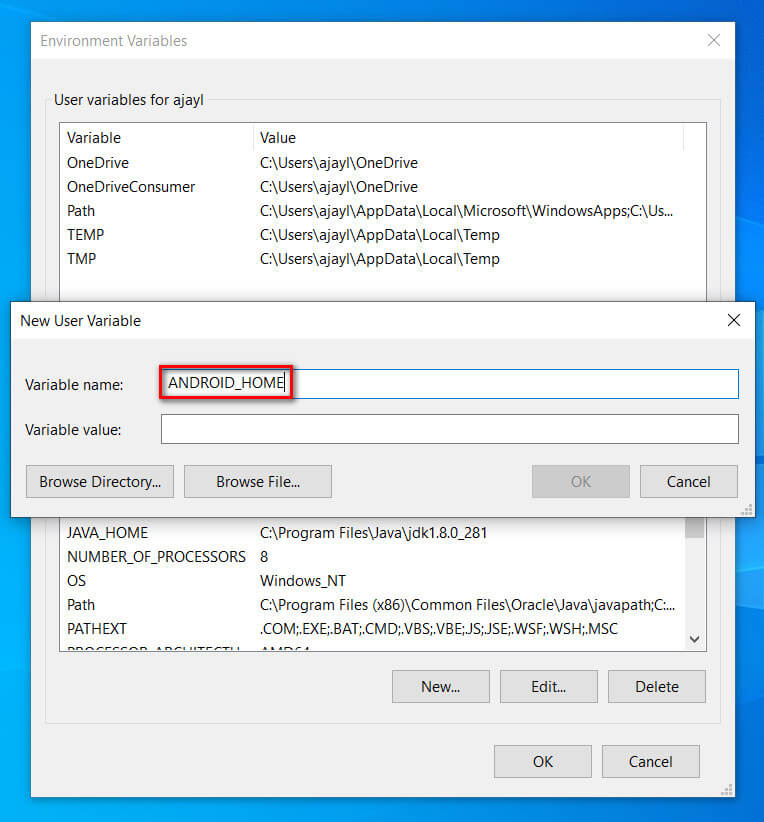
4) Now, set up the environment variable for ANDROID_HOME (Pre-requisite:- Make sure Java JDK Version 1.8 or above is successfully installed and configured on your system).
Search for the environment variable in the search bar.
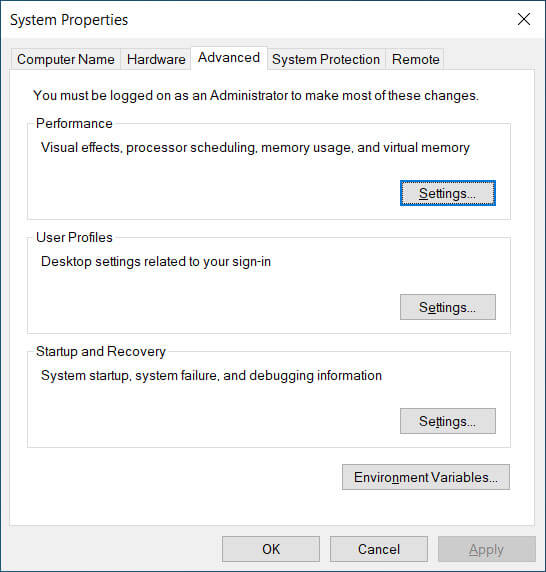
Click on the Environment Variables button
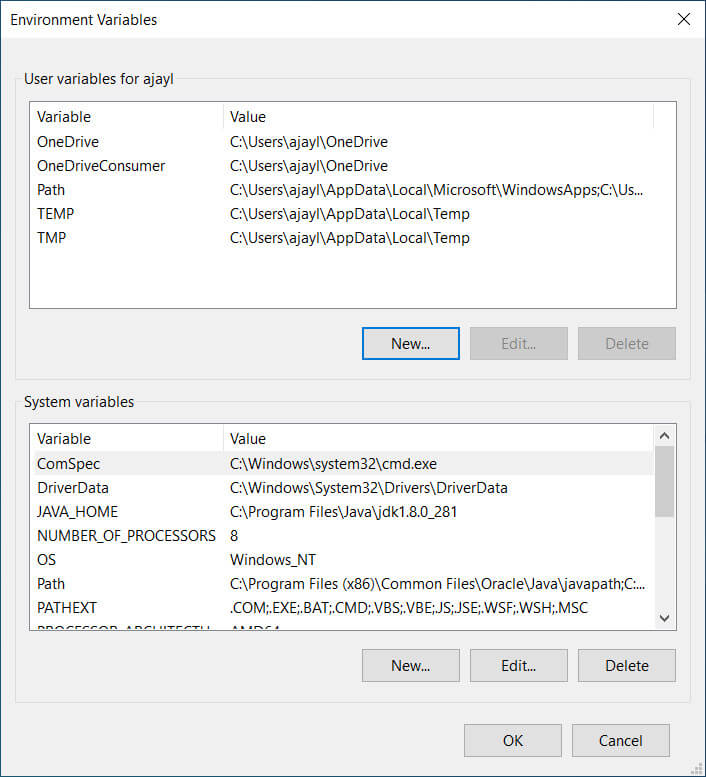
Click on the new button under the User variables section. Then enter the variable name as “ANDROID_HOME”
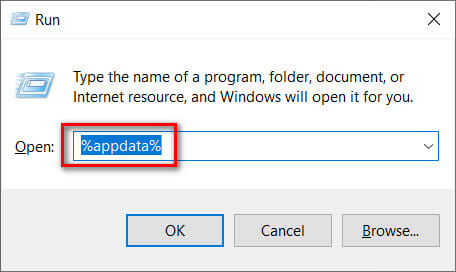
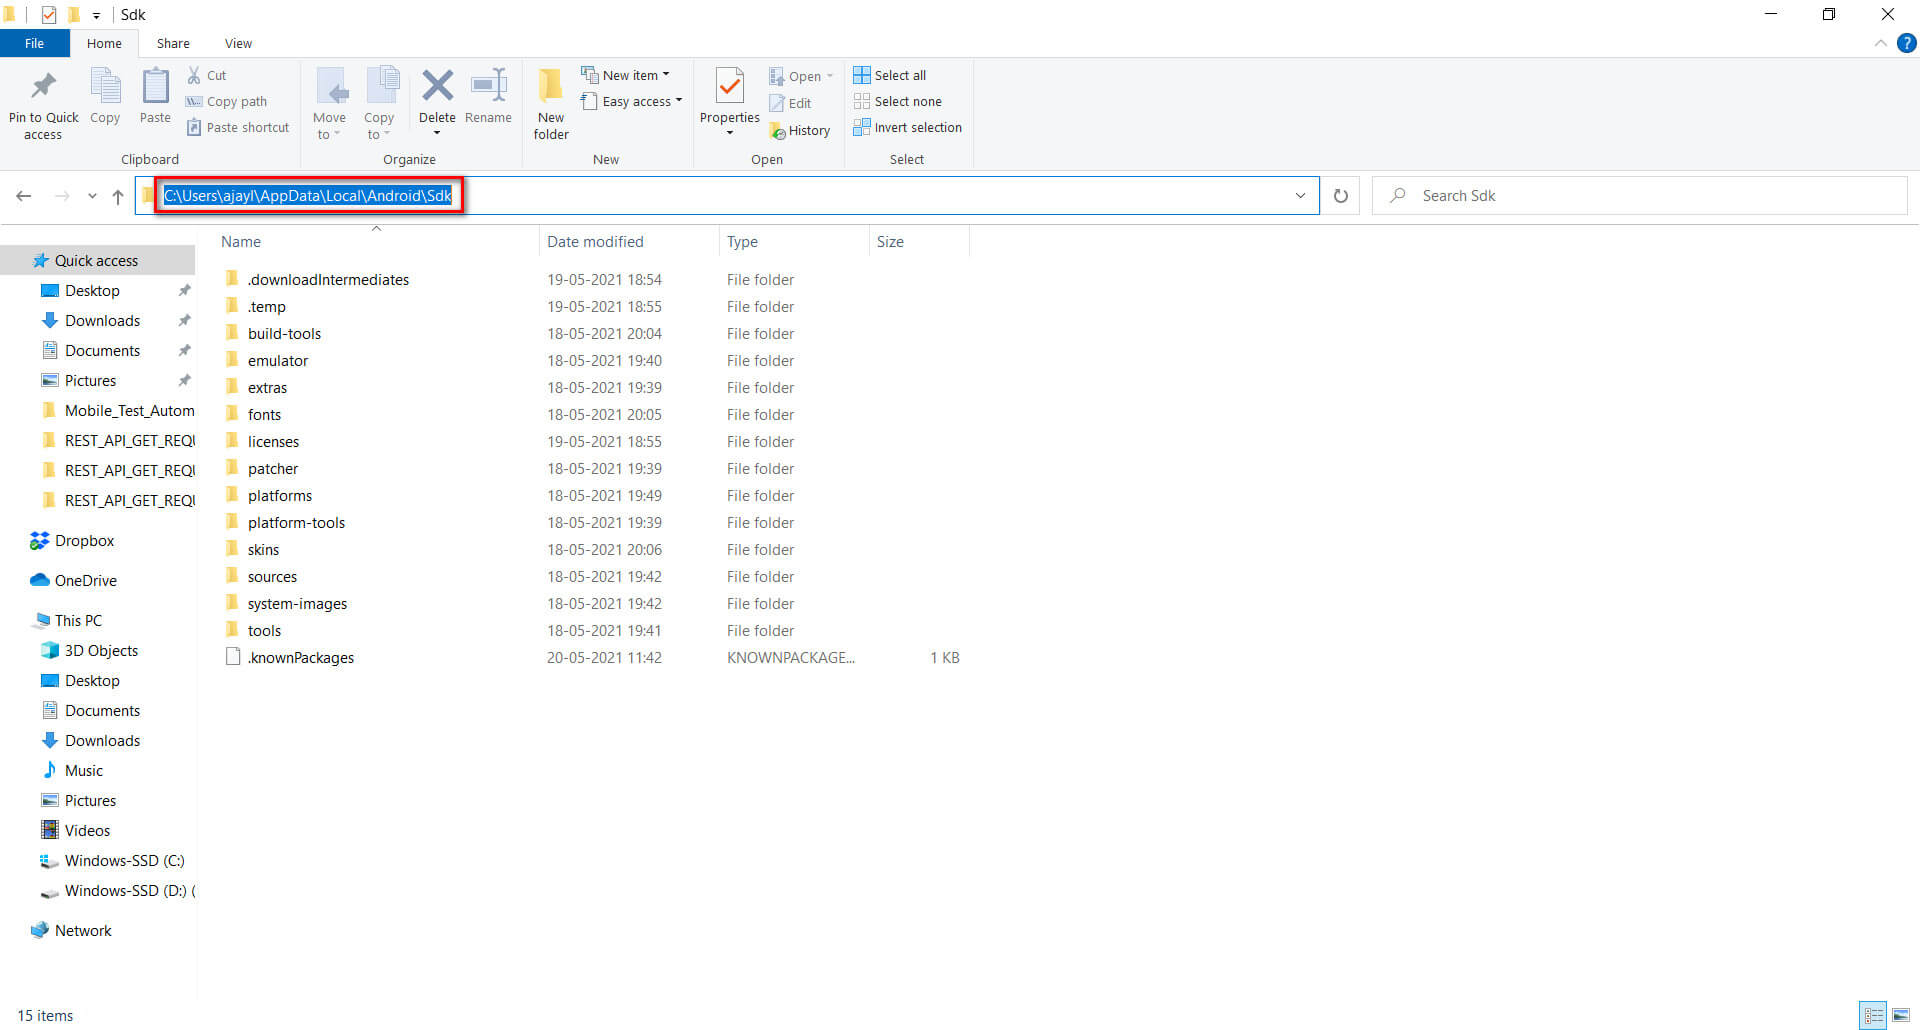
Now for entering the variable value, we need to go to the Android SDK path. For that, type run in the search bar and hit Enter button and enter “%appdata%” and click on the ok button
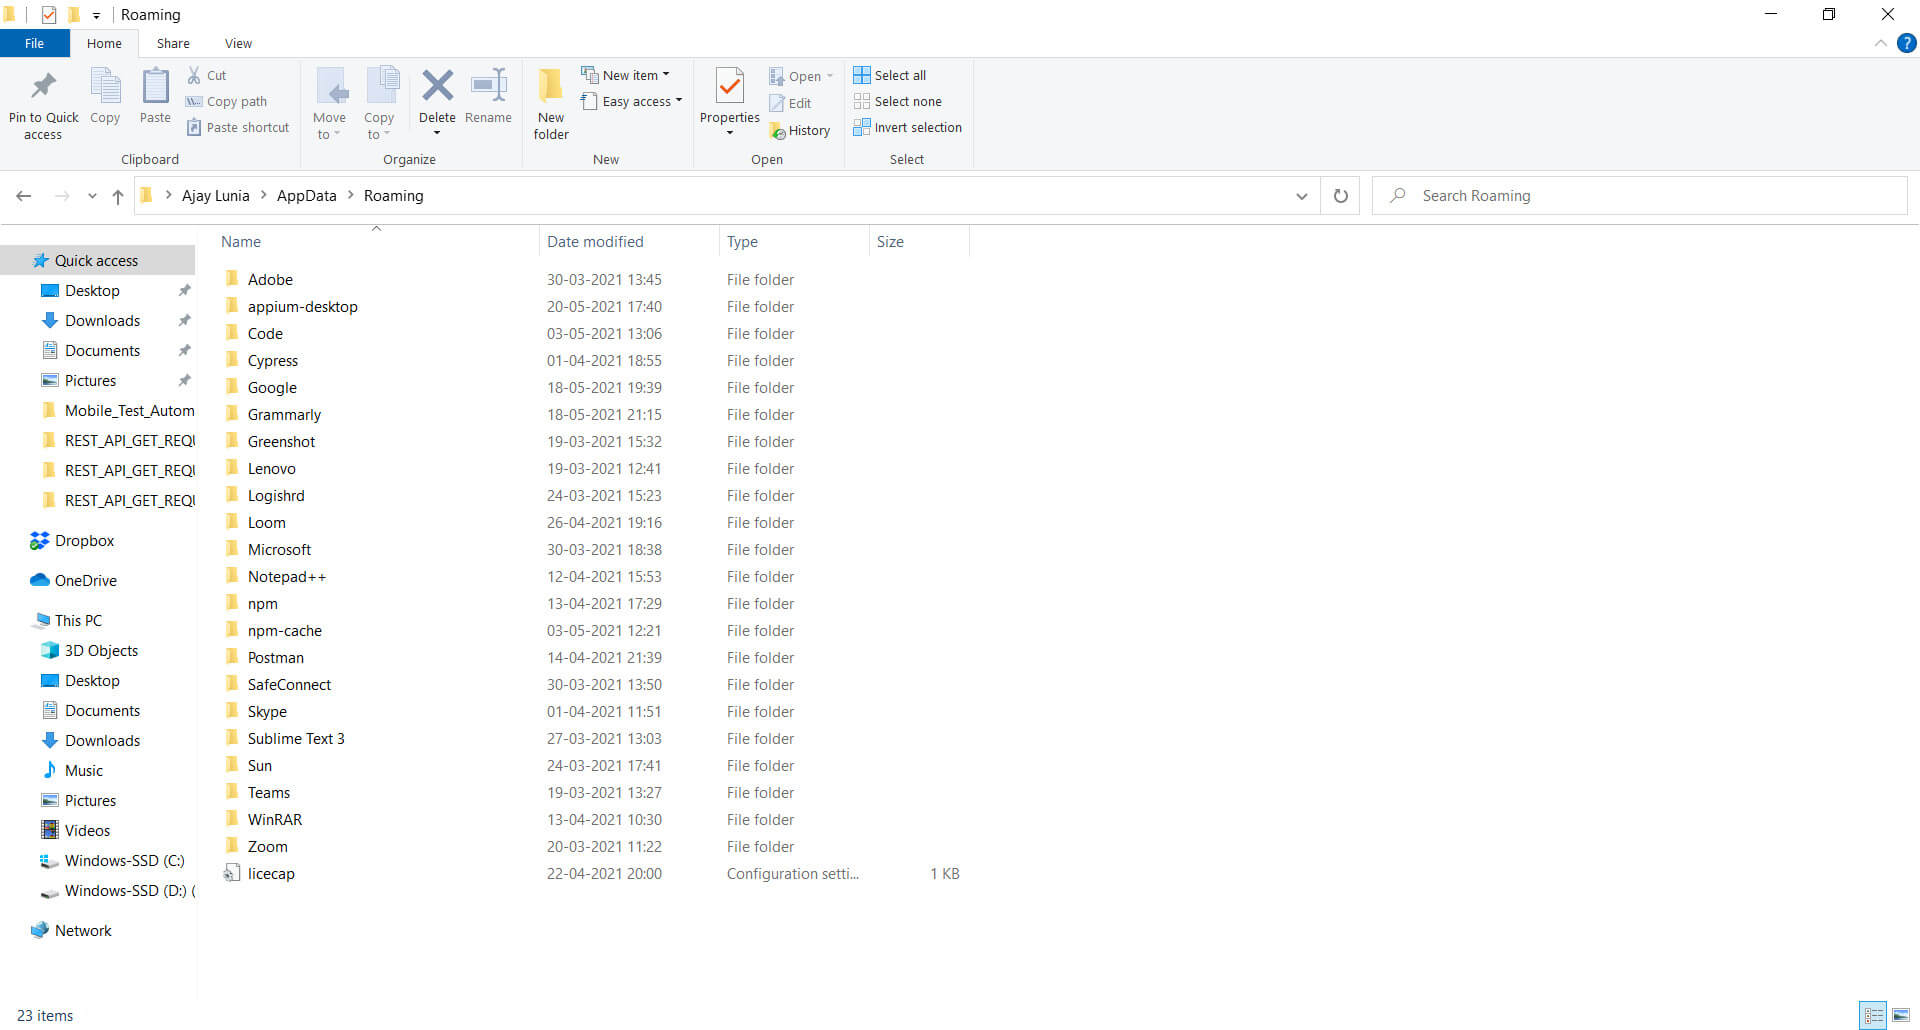
Click on the Back button and traverse to the local→ Android→ Sdk.
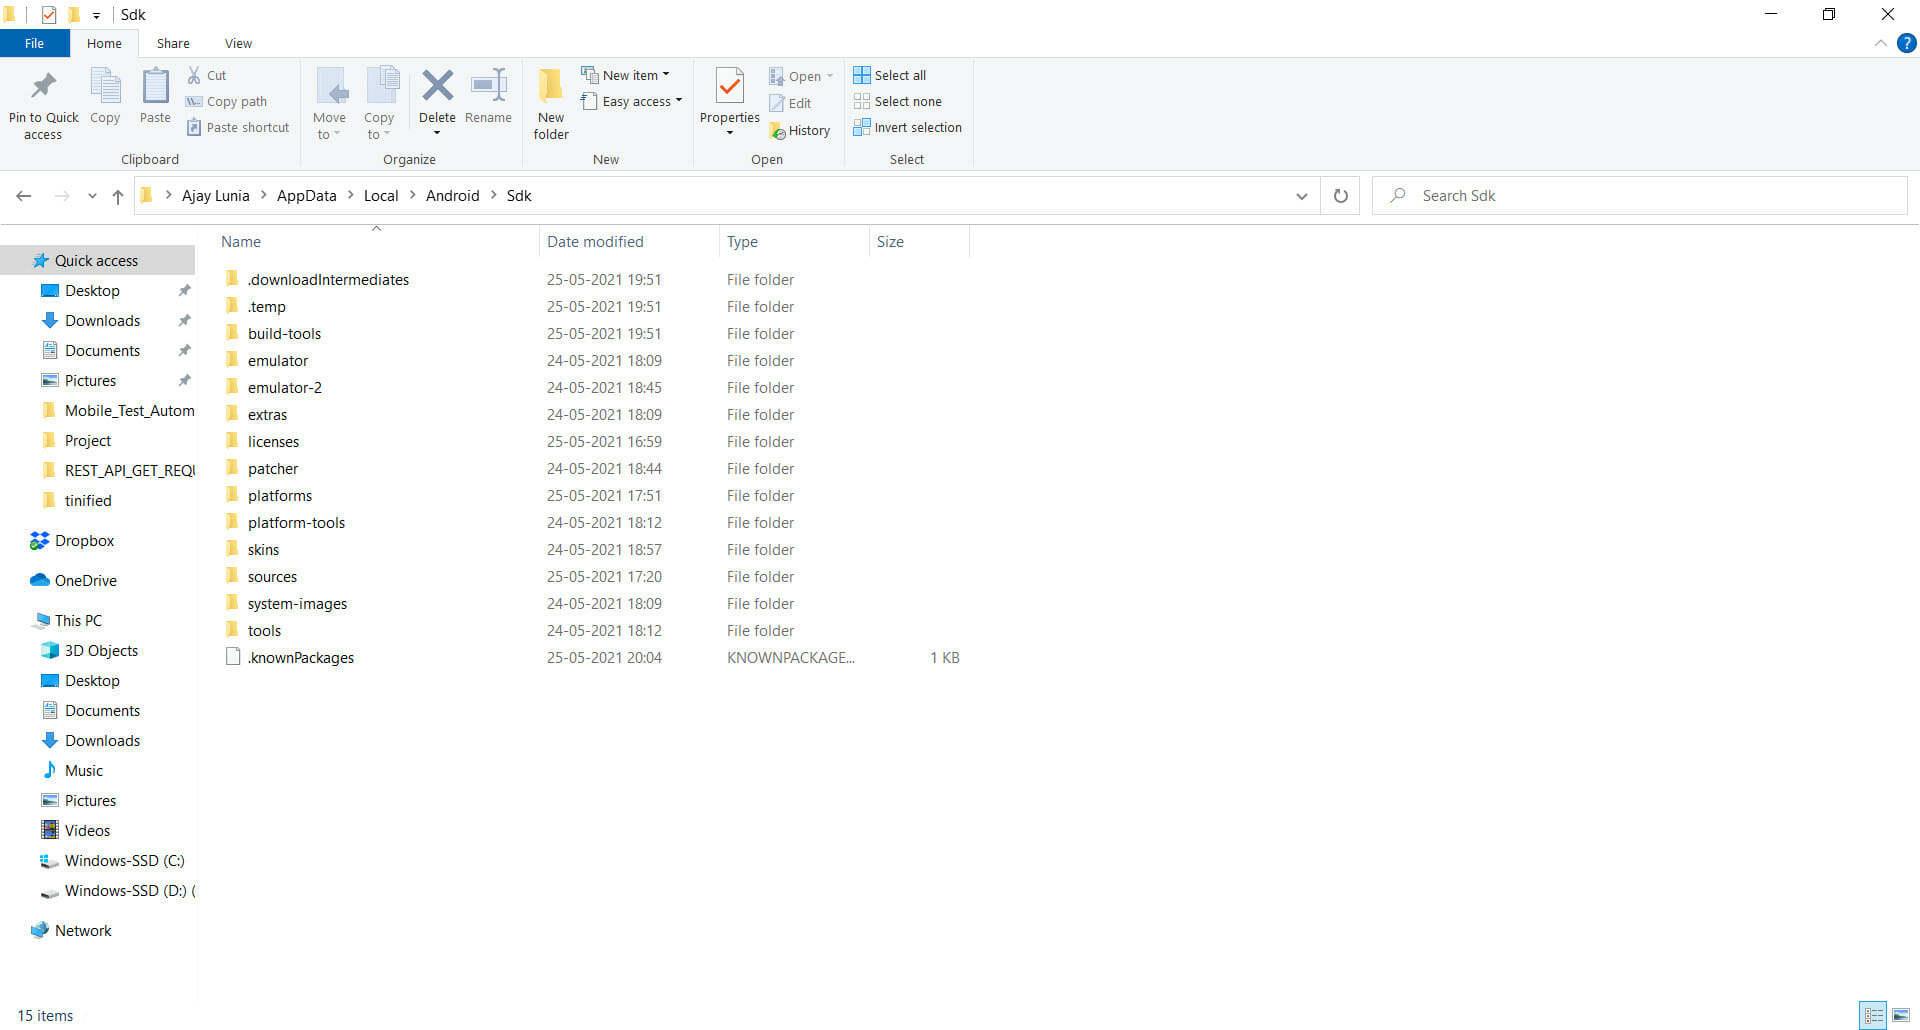
Now copy the path from the address bar and paste it into the variable value of the New user variable dialog box.
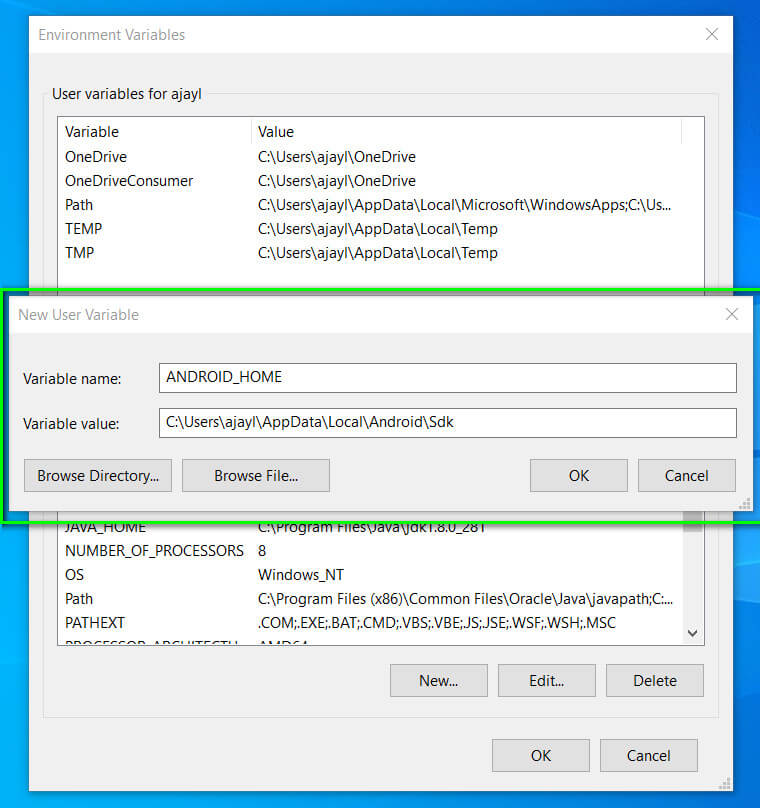
Click on the ok button.
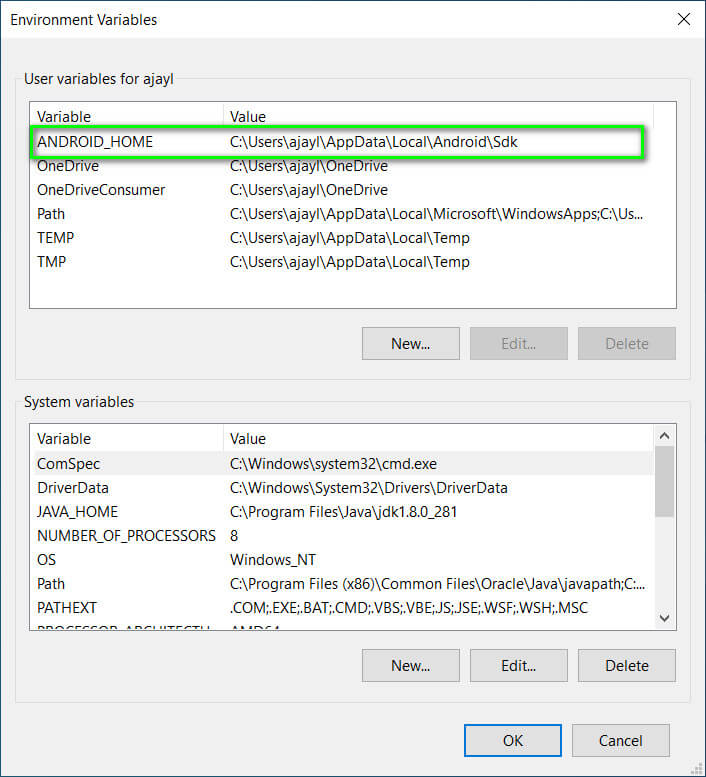
Now double click on the path under the system variable. And enter two more paths.
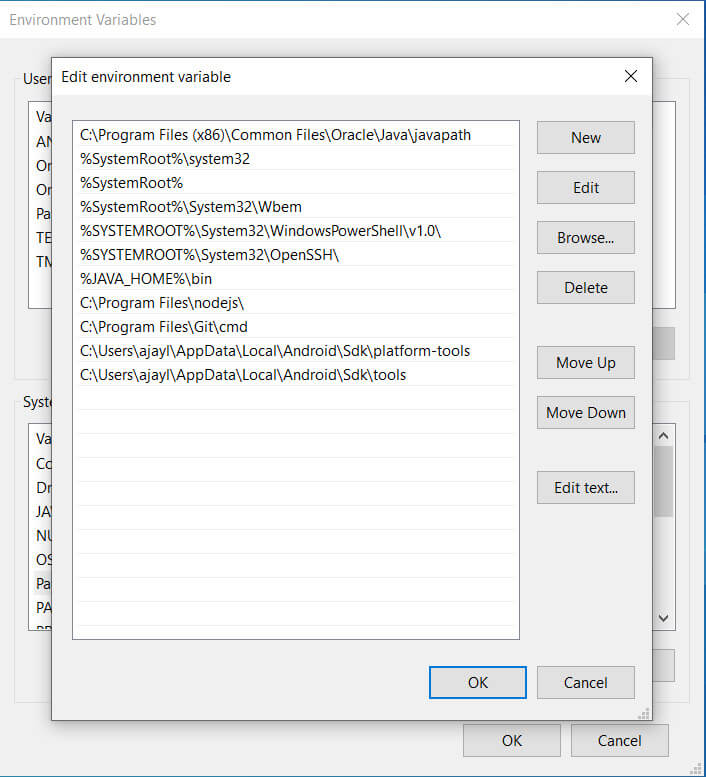
Click on the OK button and close the Environment variable dialog box by clicking on the OK button.
5) Now start android studio, and let’s set up the android emulator needed for installing the android app under test.
File → New → New Project → Phone and Tablet
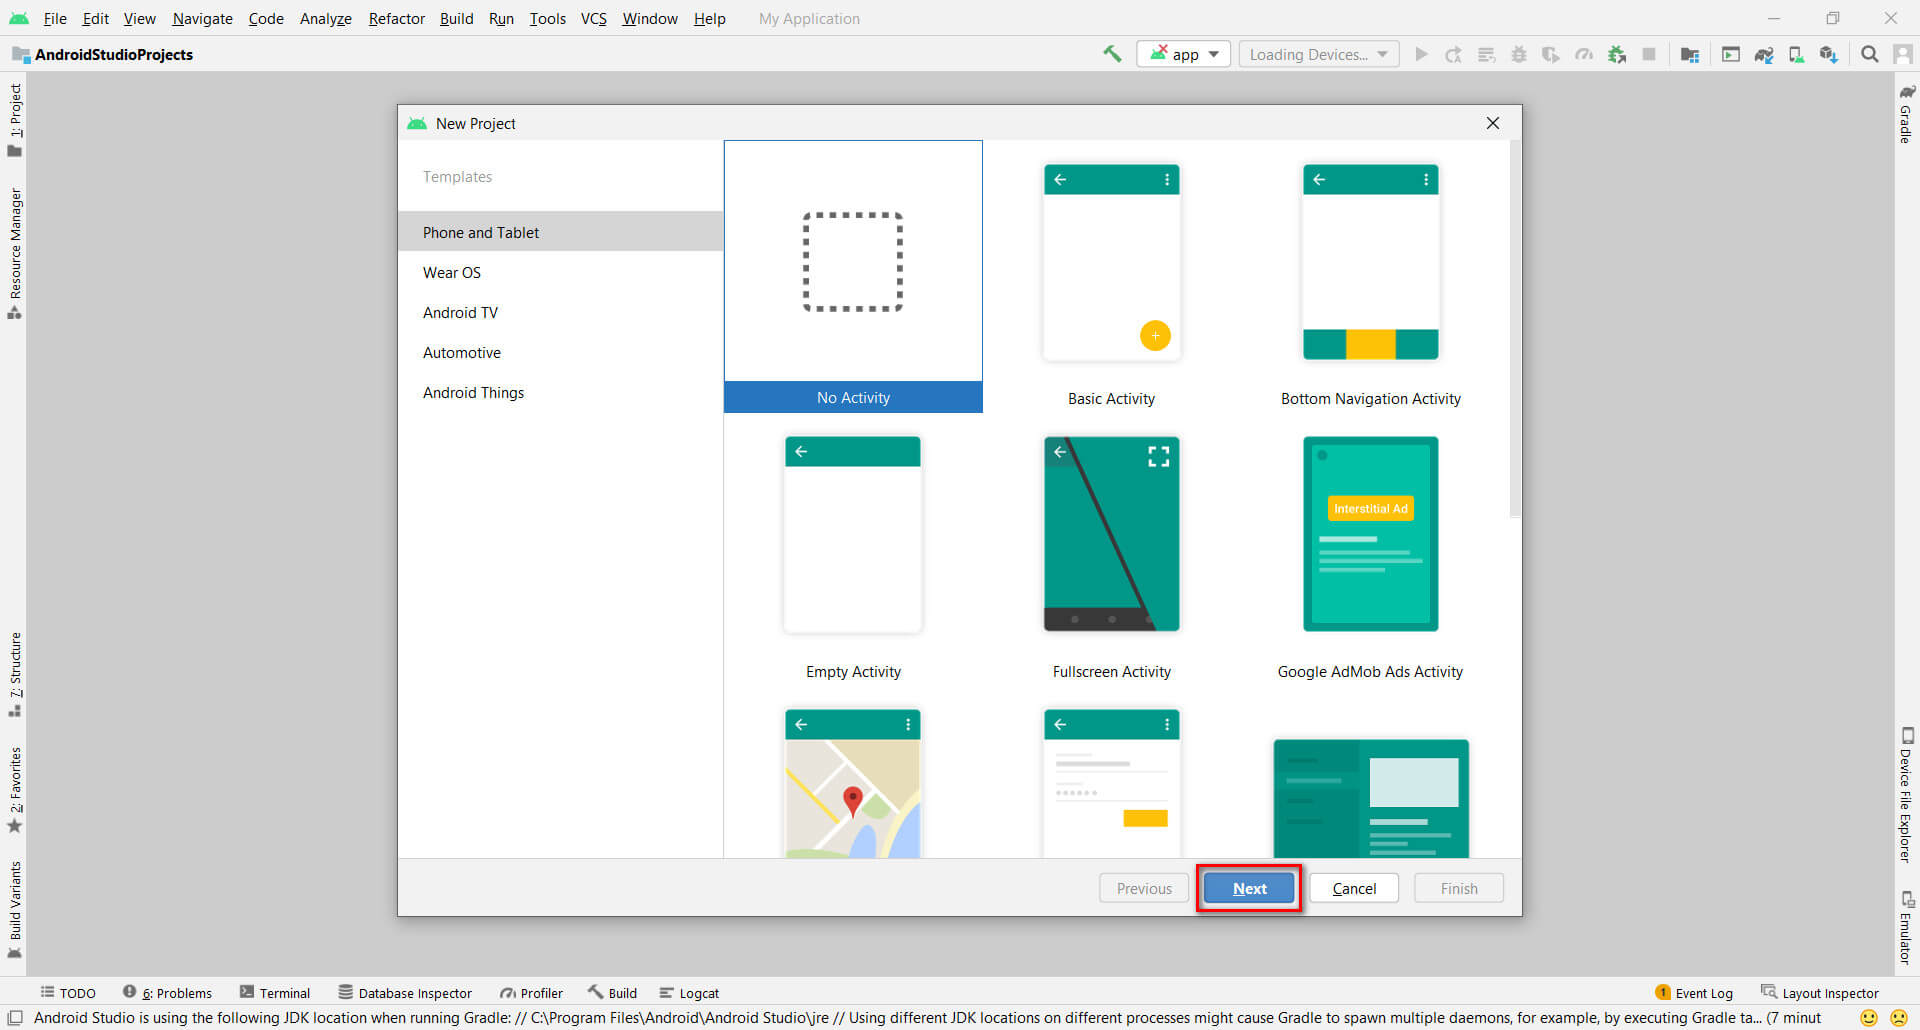
Click on the Next button.
Now give a name to the new project. I have given the name My Test App for more details, as per the screenshot below:
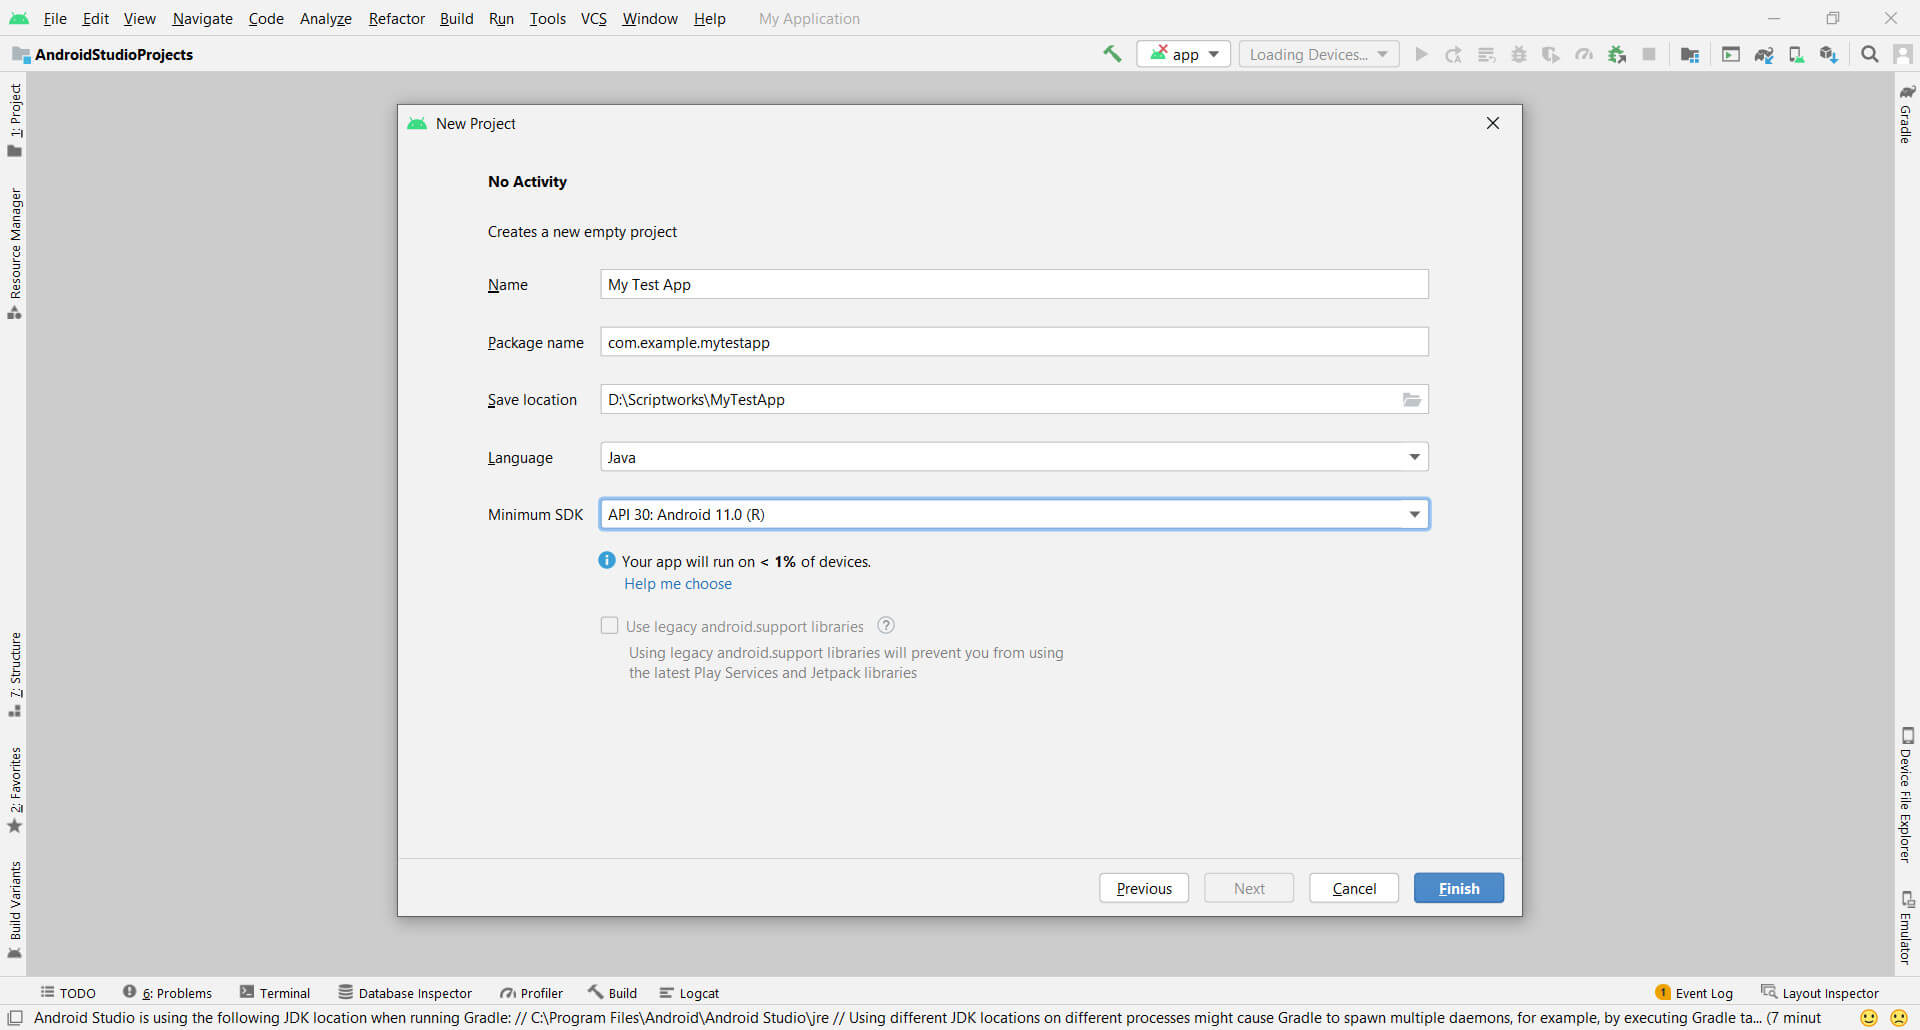
Click on the Finish button.
Now go to tools and click on AVD Manager. (Tools → AVD Manager)
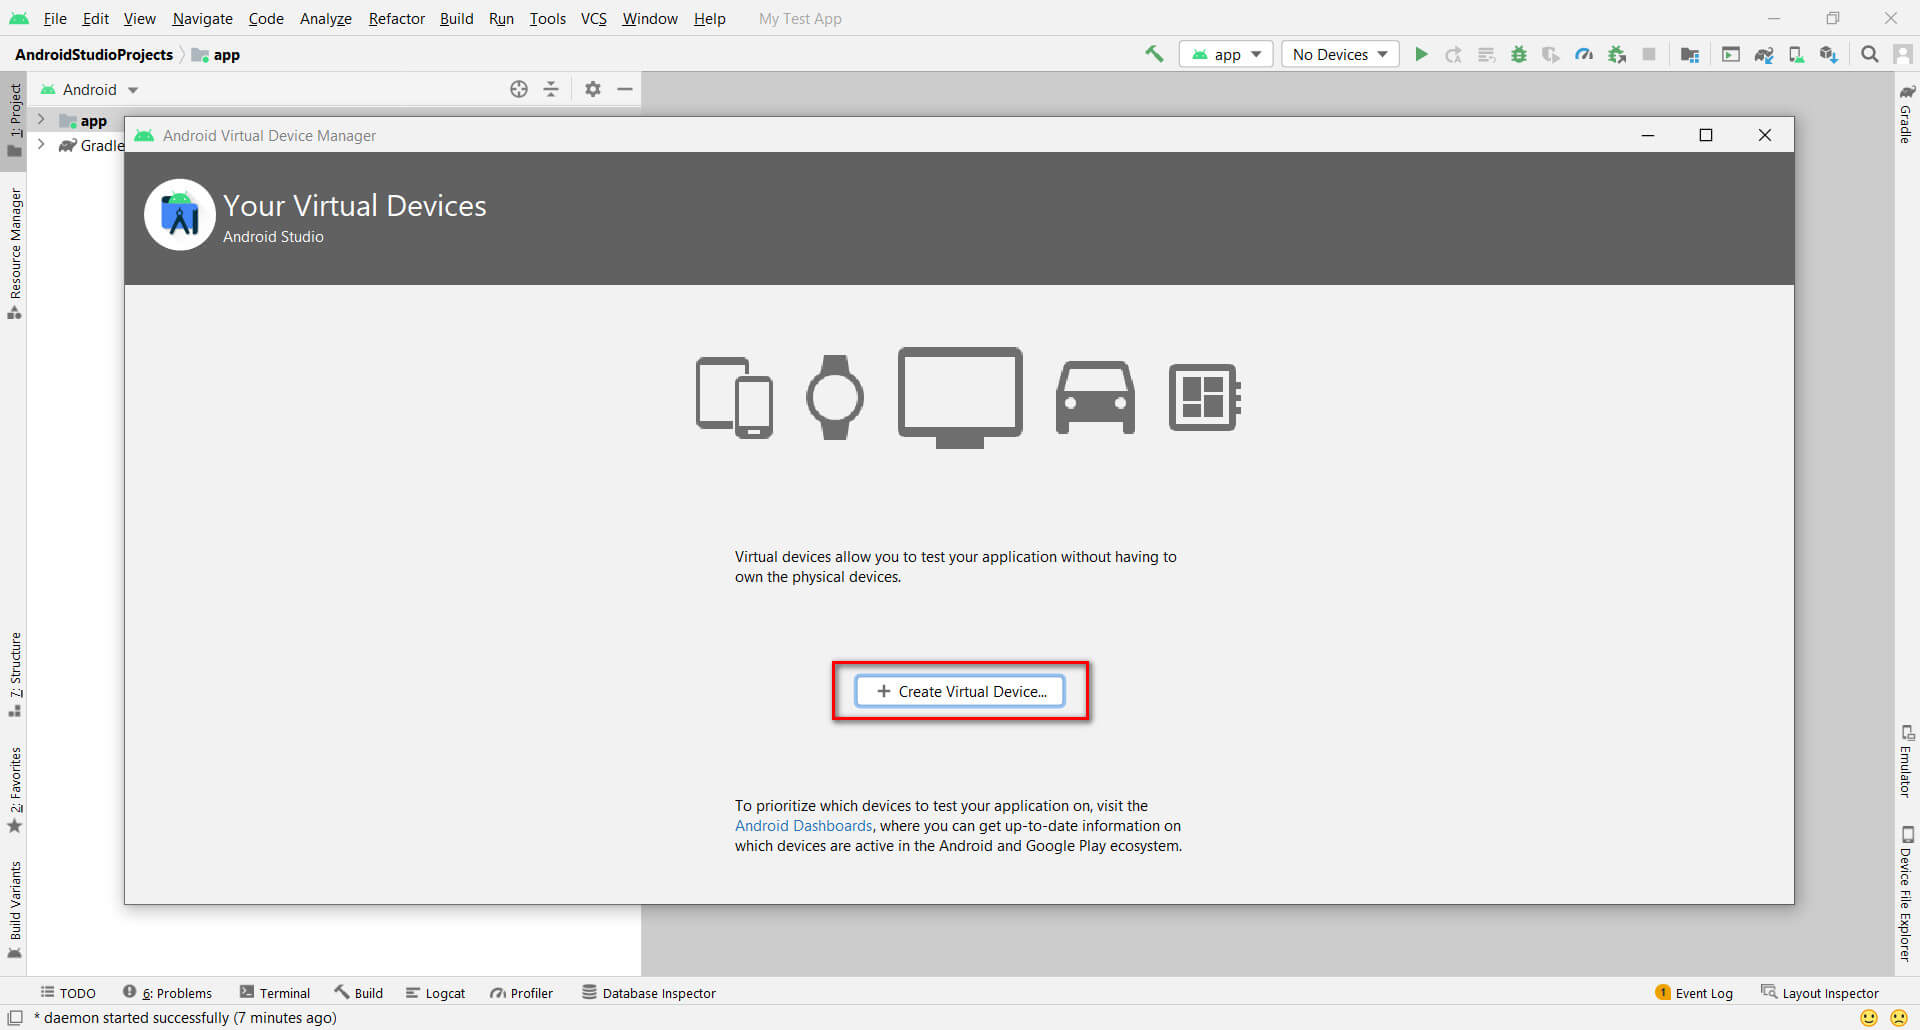
Click Create Virtual Device
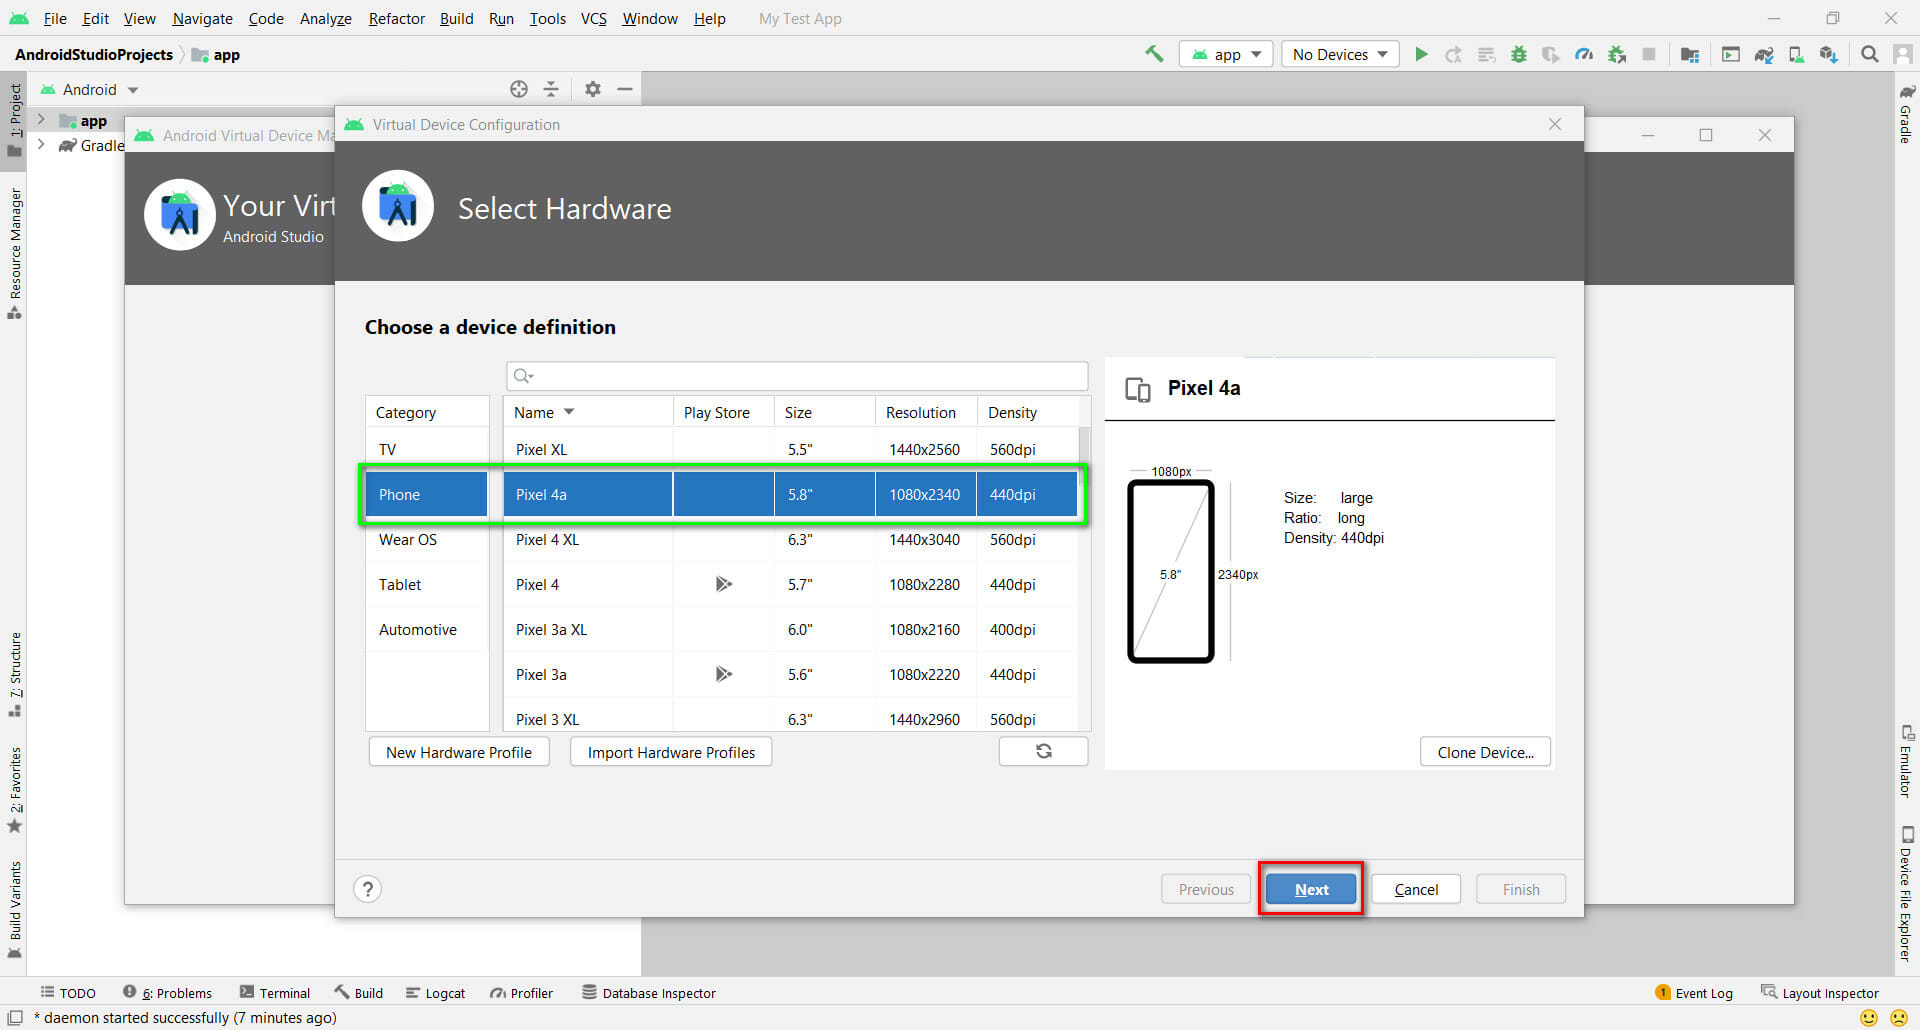
Under Category, Select Phone and select Pixel 4a, then click on the Next button.
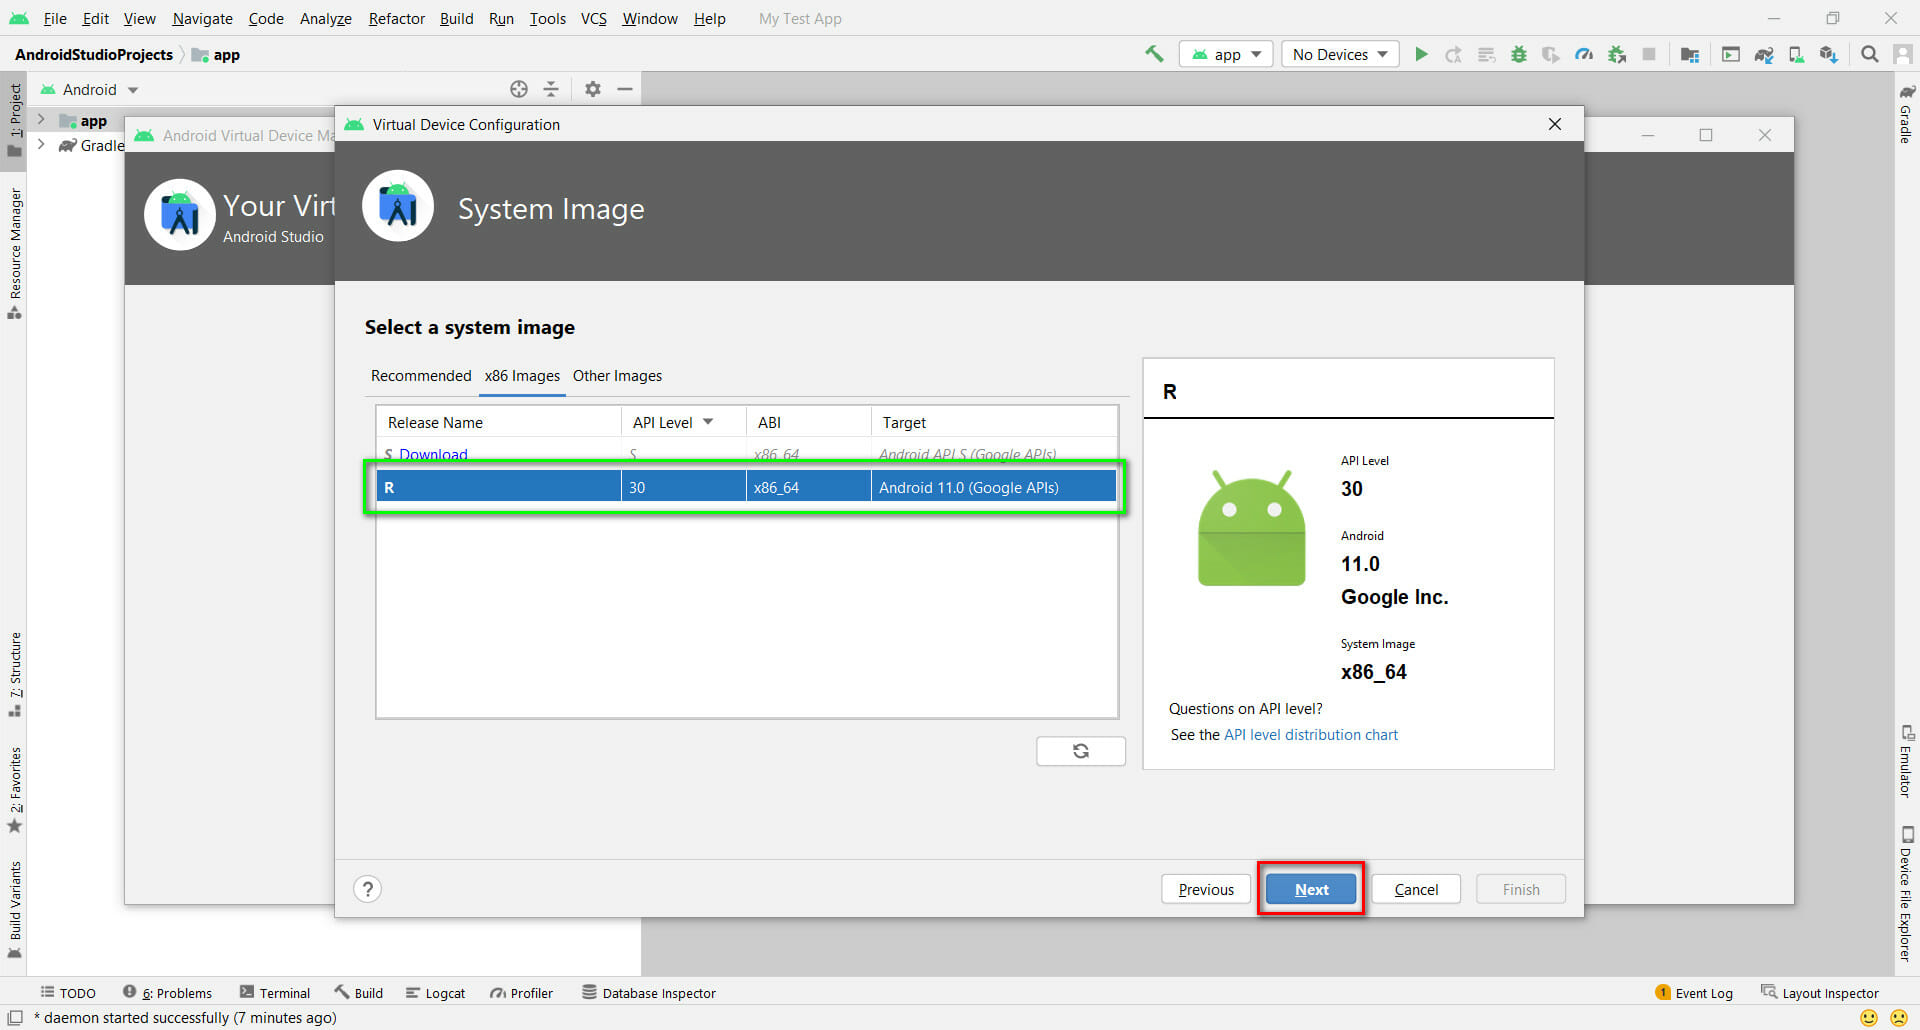
Now Select a System Image. We are selecting API Level for our emulator. You will see it under the x86 Images option. If it is not present then it can be download. Then click on the Next Button.
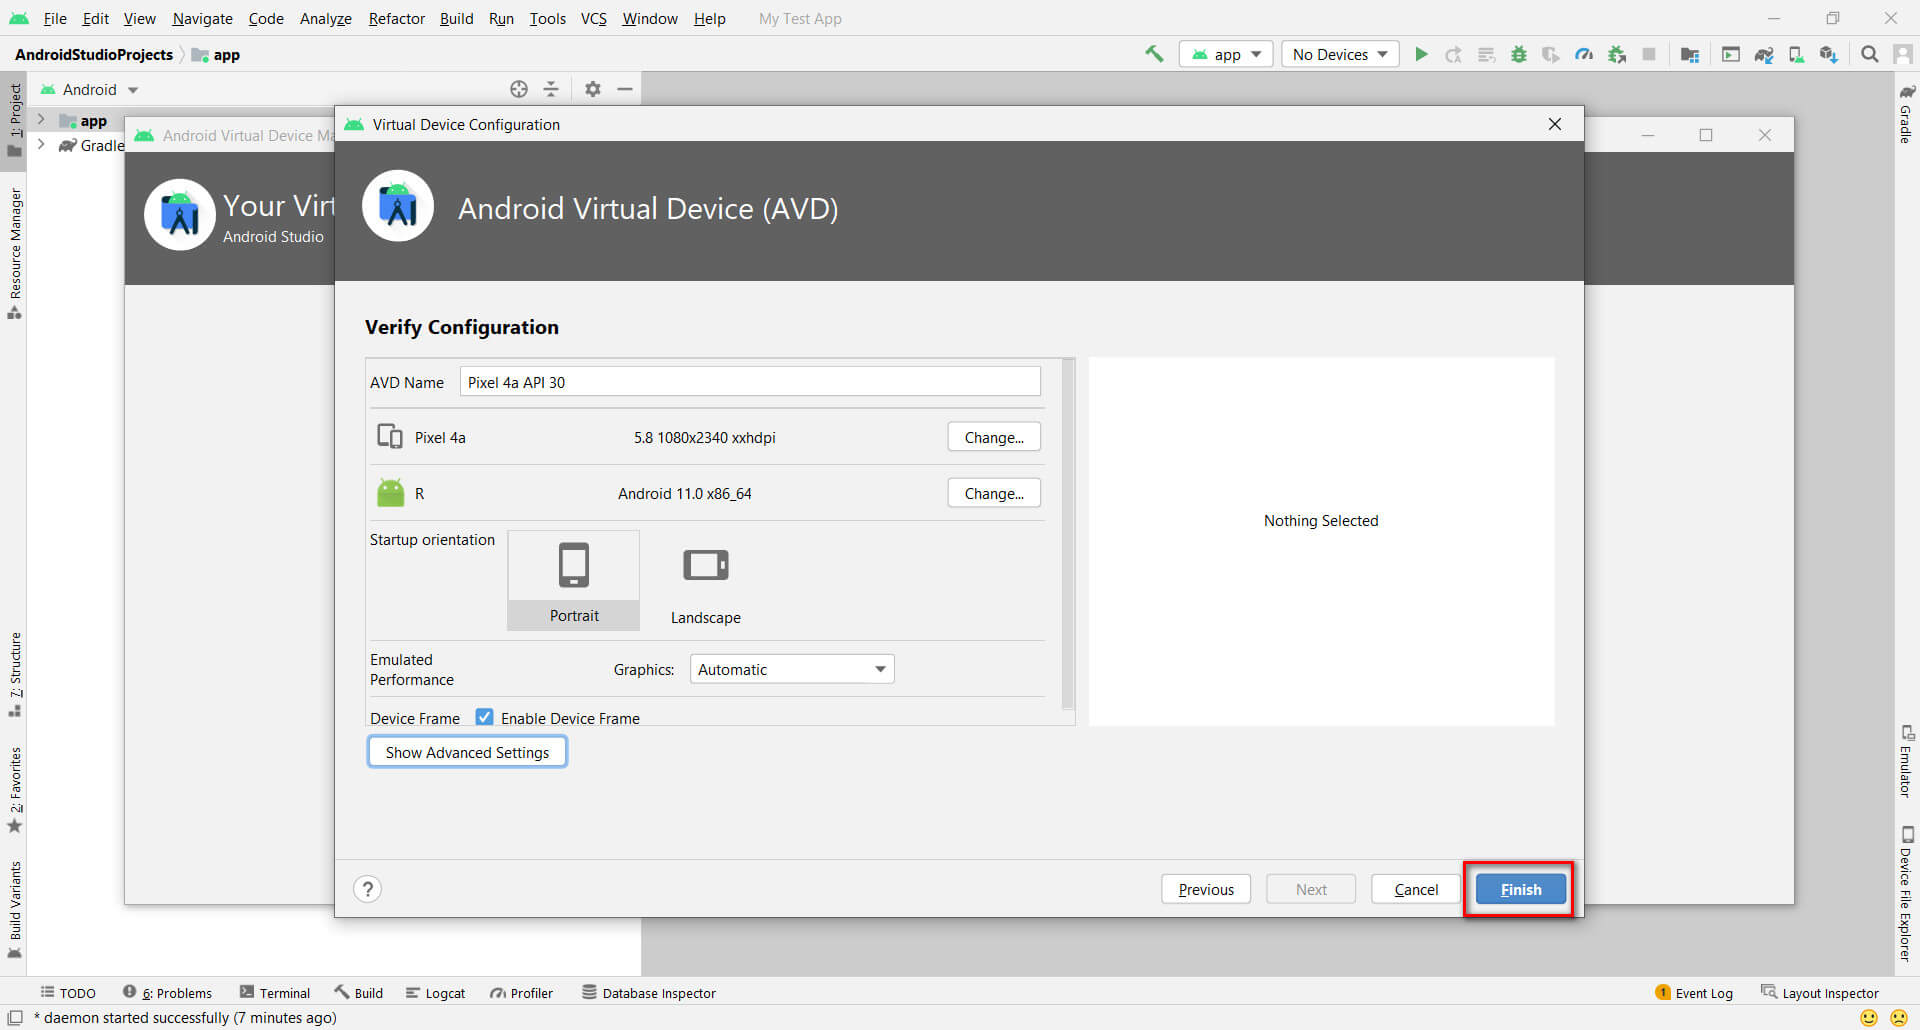
Now Finally, Click on Finish Button.
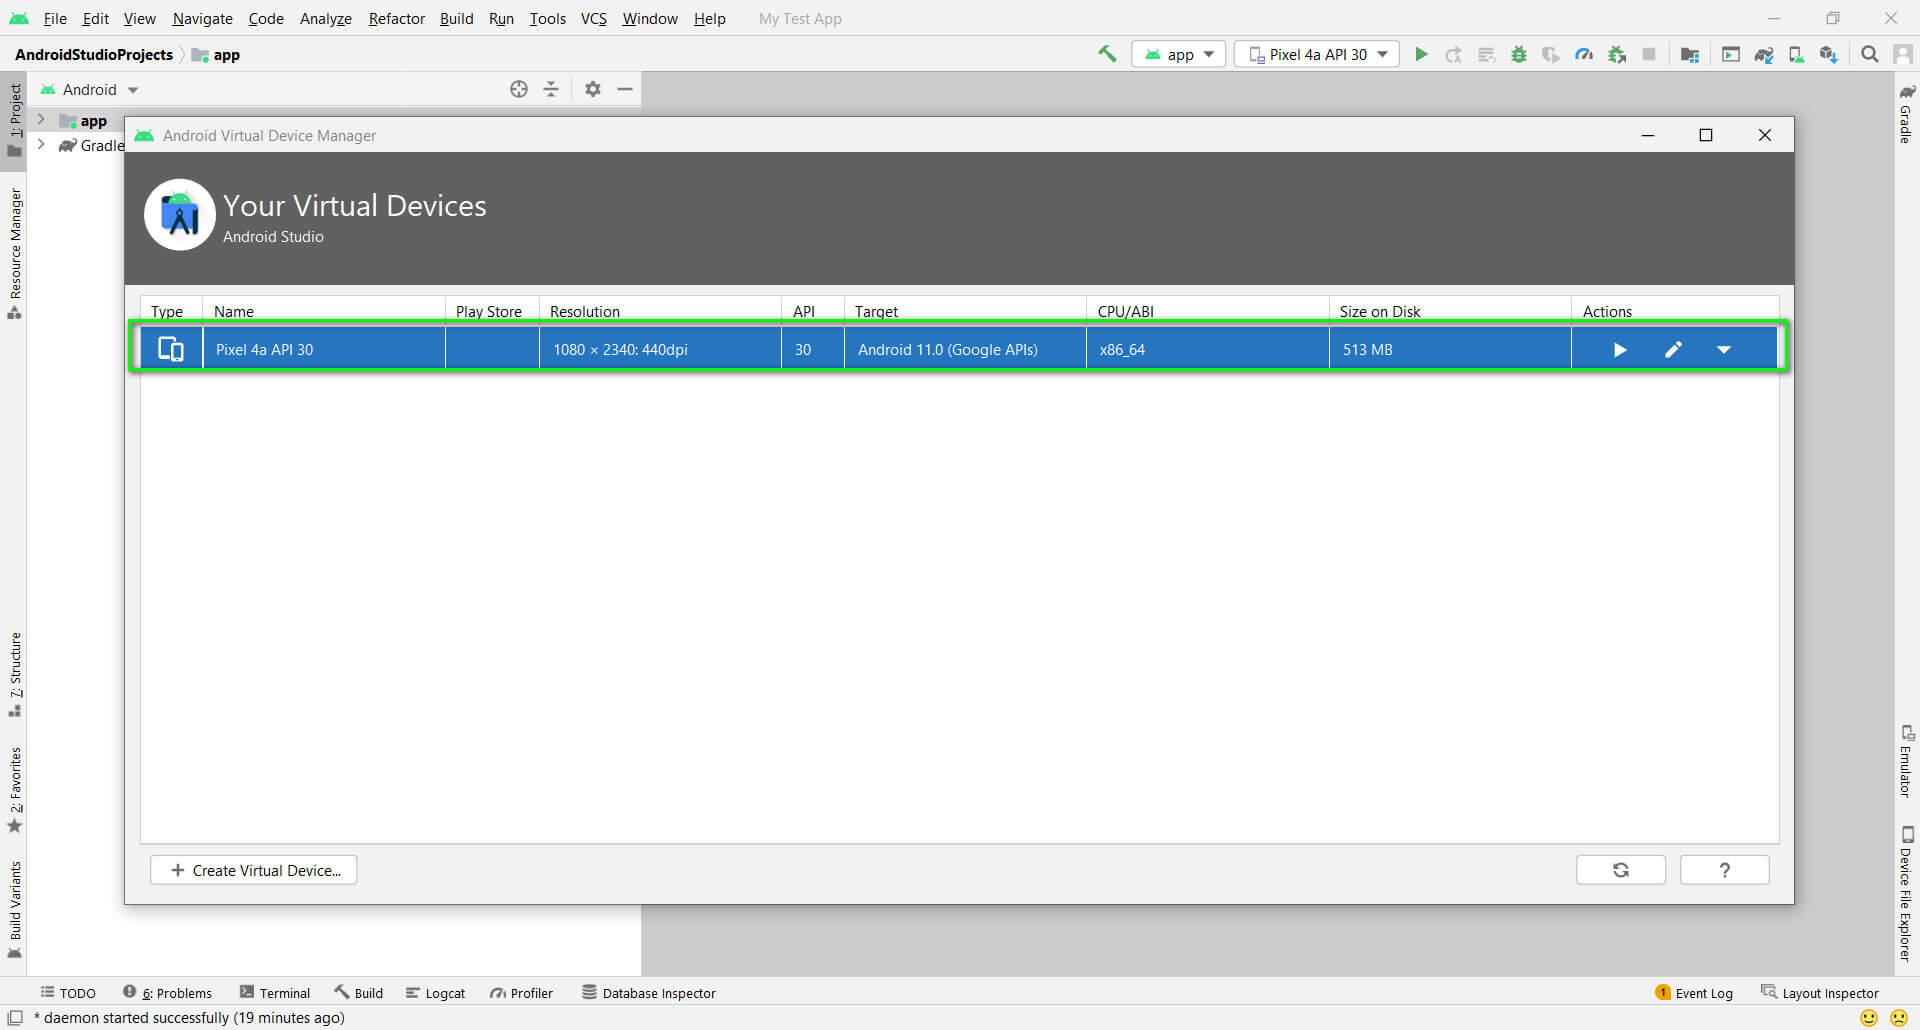
You will see your virtual device/emulator under Android Virtual Device Manager.
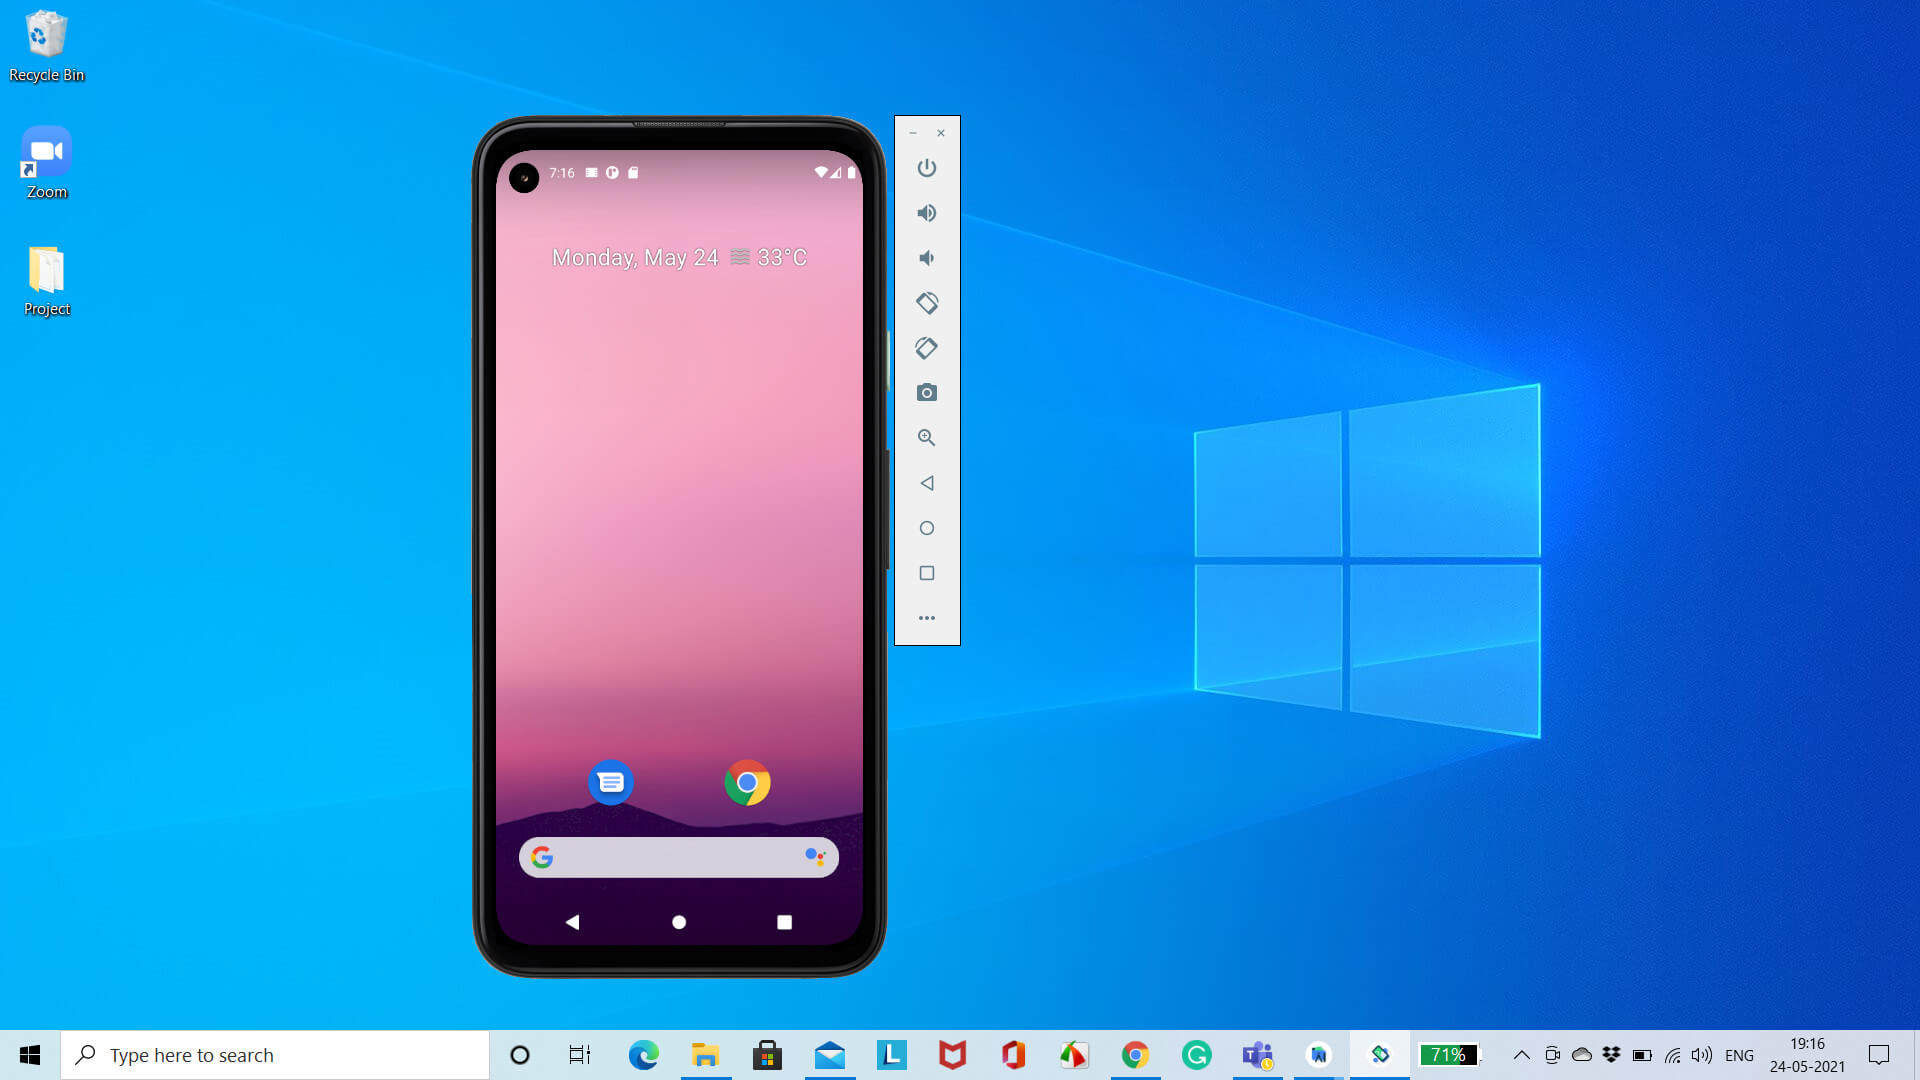
Start it by clicking on the play button.
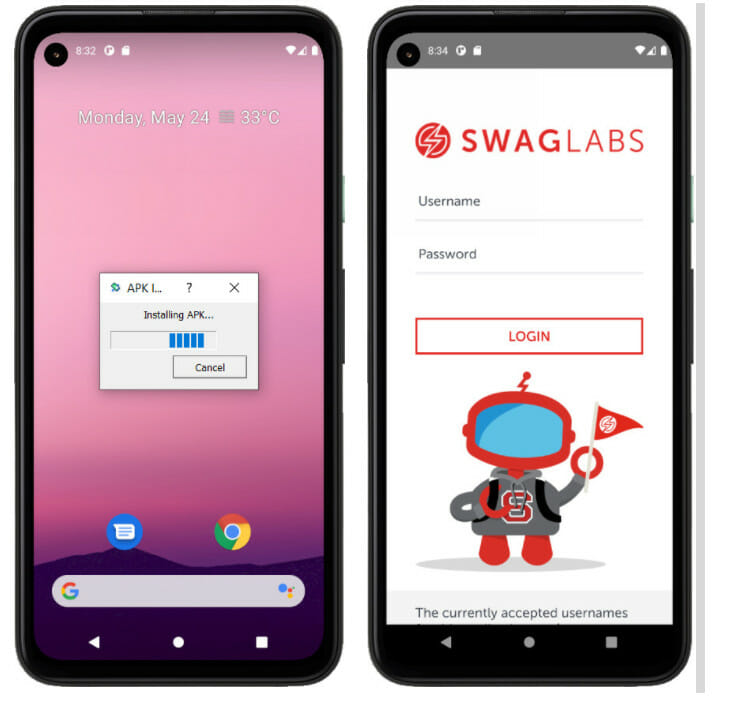
6) Now, we will install the Application Under Test on the Emulator. For this exercise, we will use the Saucelabs Sample mobile app which can be downloaded from this location:-
Download it and drag and drop it onto the emulator window. You should see the installation being performed in the emulator, as shown in the screenshot below.
6) Now we will install Appium on our windows machine so that Scriptworks can interact with the Appium server and enable us to automate our application installed on the emulator.
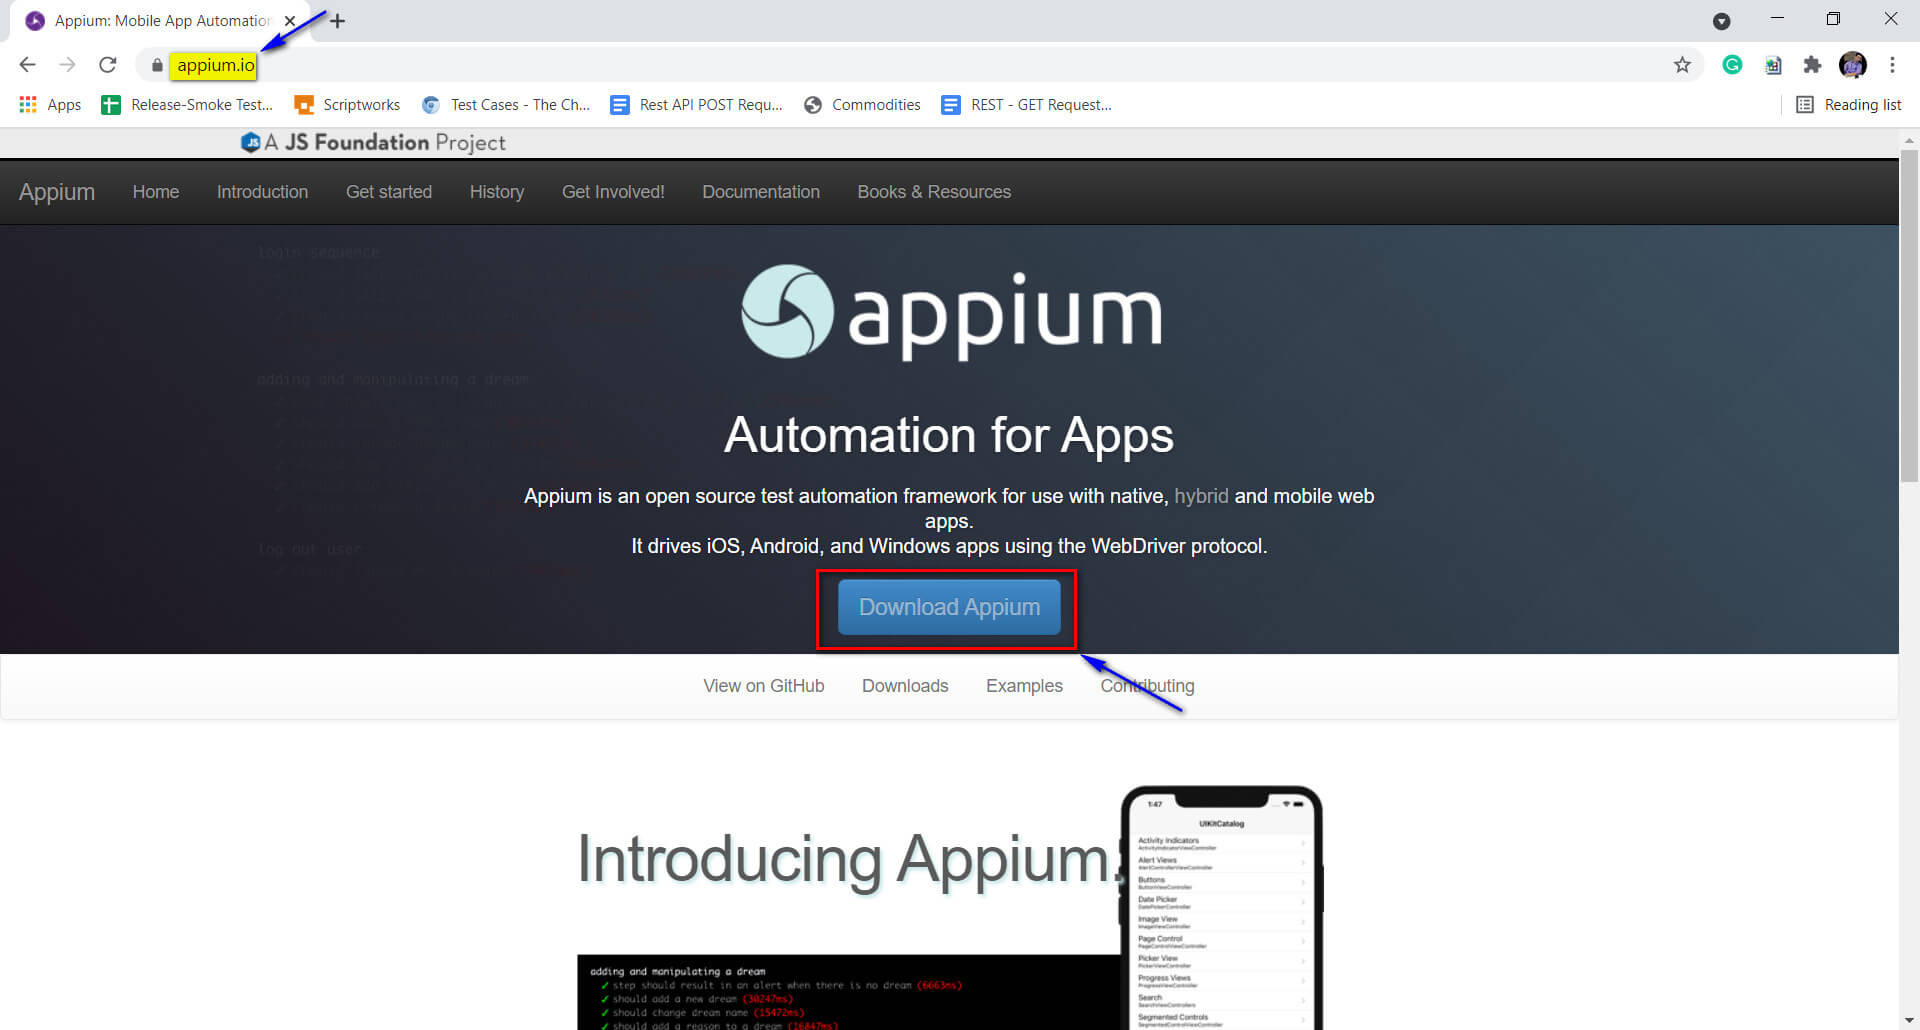
To Install Appium, navigate to https://appium.io/ and click on Download Appium.
Double Click on the Downloaded .exe (executable file) for starting the installation process.
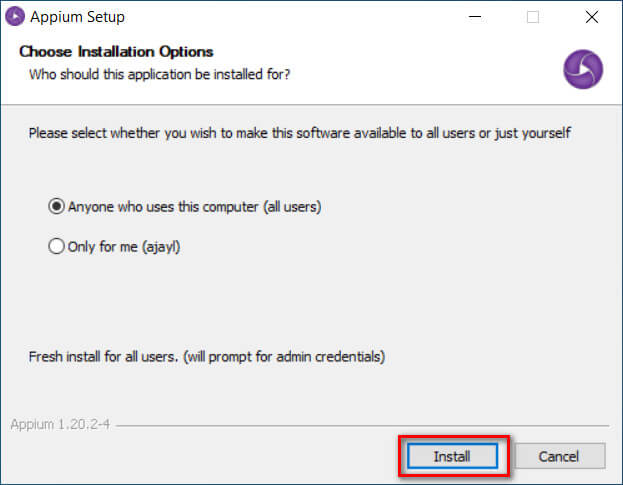
Check the radio button mentioning for all users. And click on the install button.
After the installation process has been completed, uncheck Run Appium and Click on the Finish button.

7) Android Studio is Installed, the Android Emulator with the Application Under Test is ready, Appium is Installed. Now, what is left?
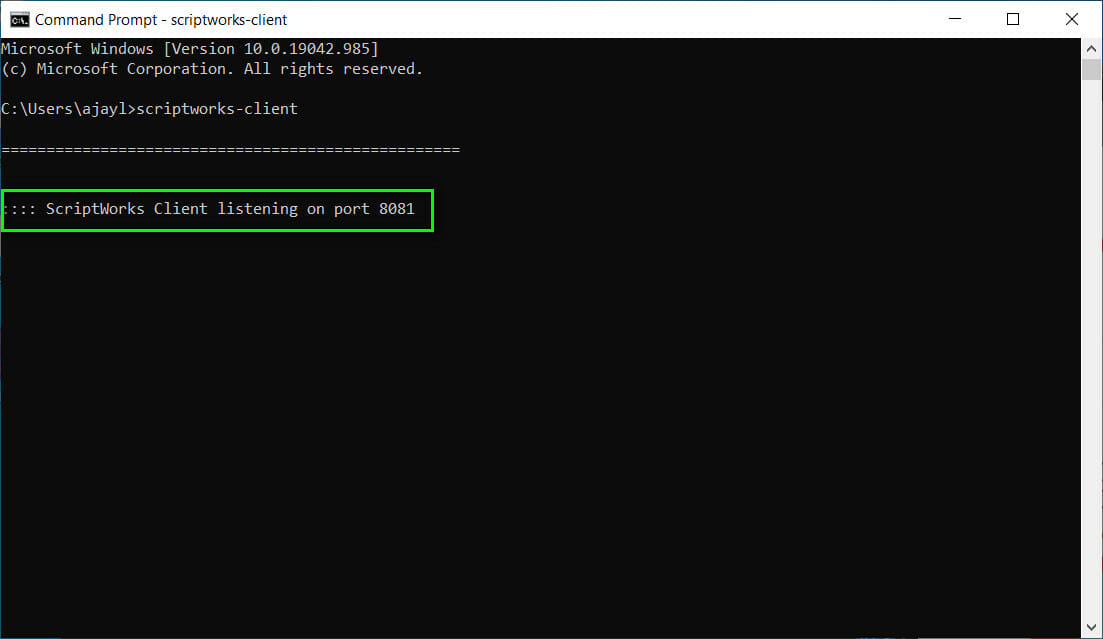
We are left with starting our scriptworks-client. If we have not installed it yet and don’t know how to run it, then please follow this Article.
Next we will set up Scriptworks Run Settings. Before filling out the Run Settings Info, we require three important parameters, which are as follows:-
Let’s figure out how we can get all of them one by one.
To get the app package and app activity of the mobile application:-
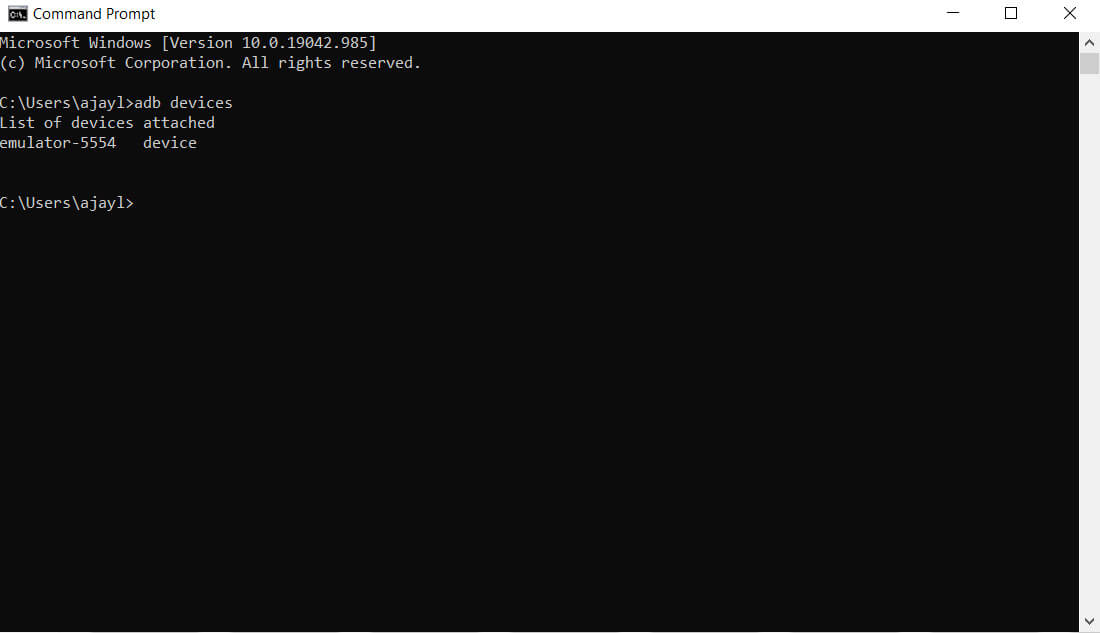
Open windows command prompt.
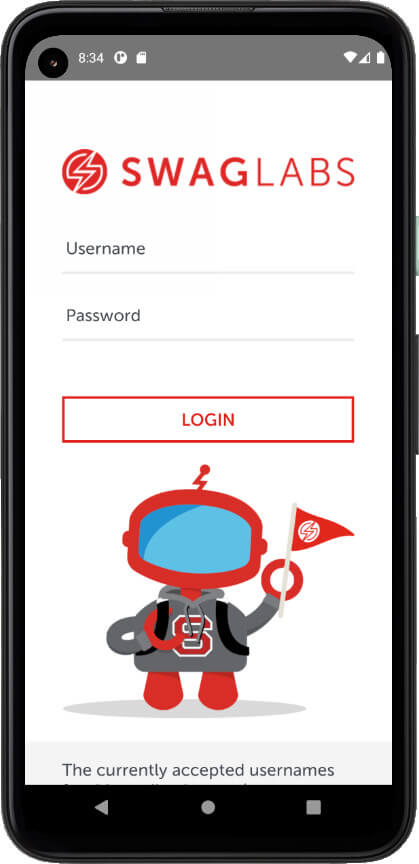
Now open the mobile app under test in your emulator. As shown below, screenshot.
In the command prompt, check if any devices are connected to it by entering “adb devices”'
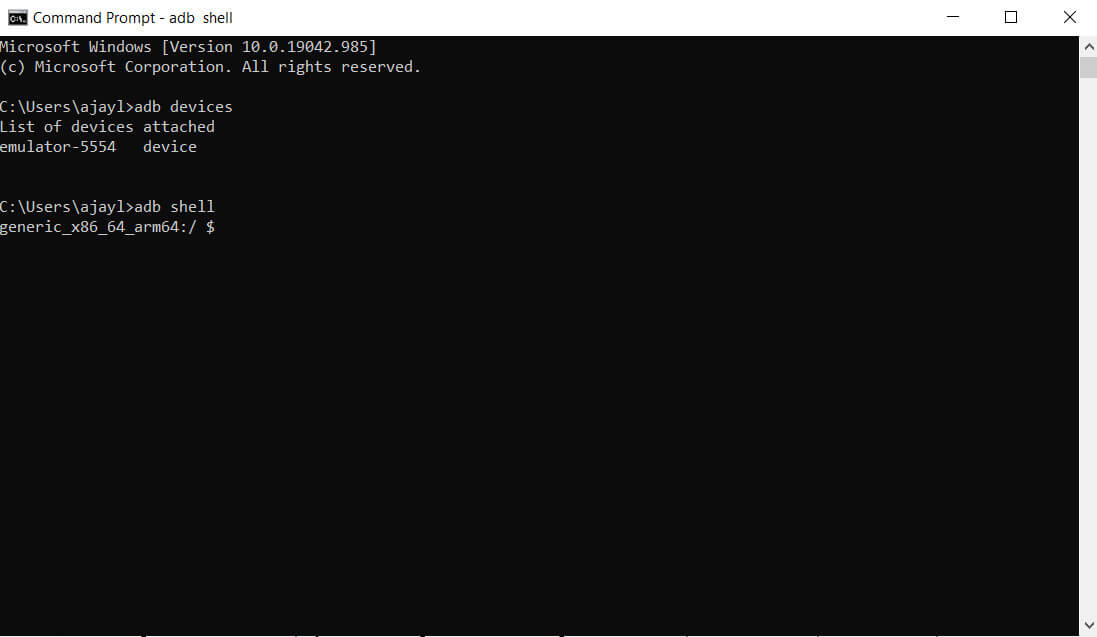
Now enter the command “adb shell”
After that, enter the command:
dumpsys window | grep - E mCurrentFocus
and hit enter/return.
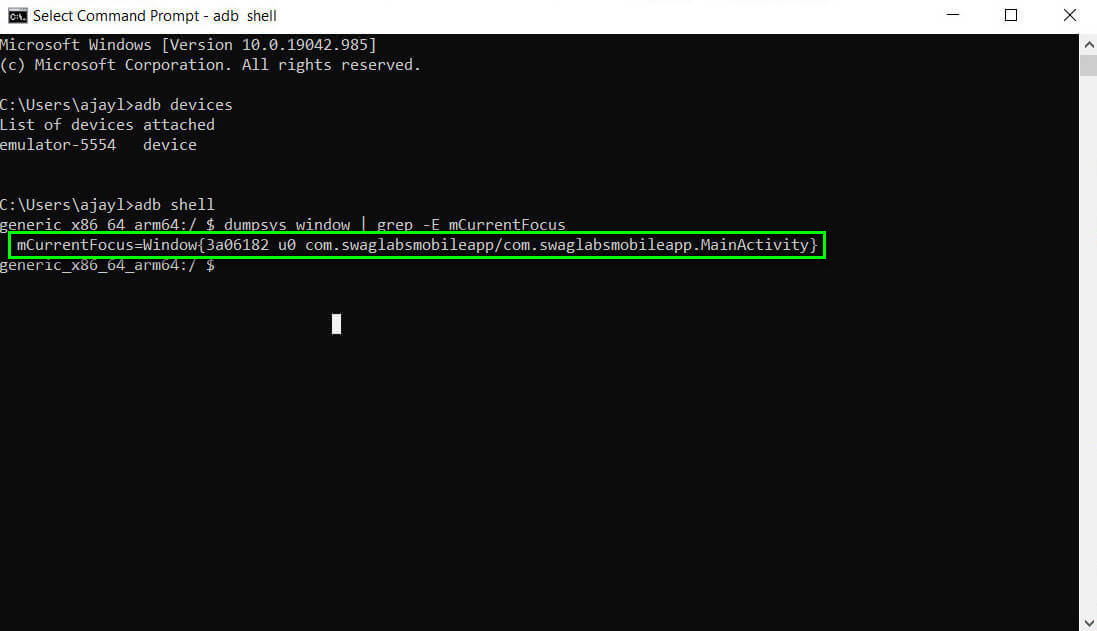
Here, the part before the '/' character, i.e., com.swaglabsmobileapp is the Package name, and the part after that, i.e., com.swaglabsmobileapp.MainActivity is the Activity name.
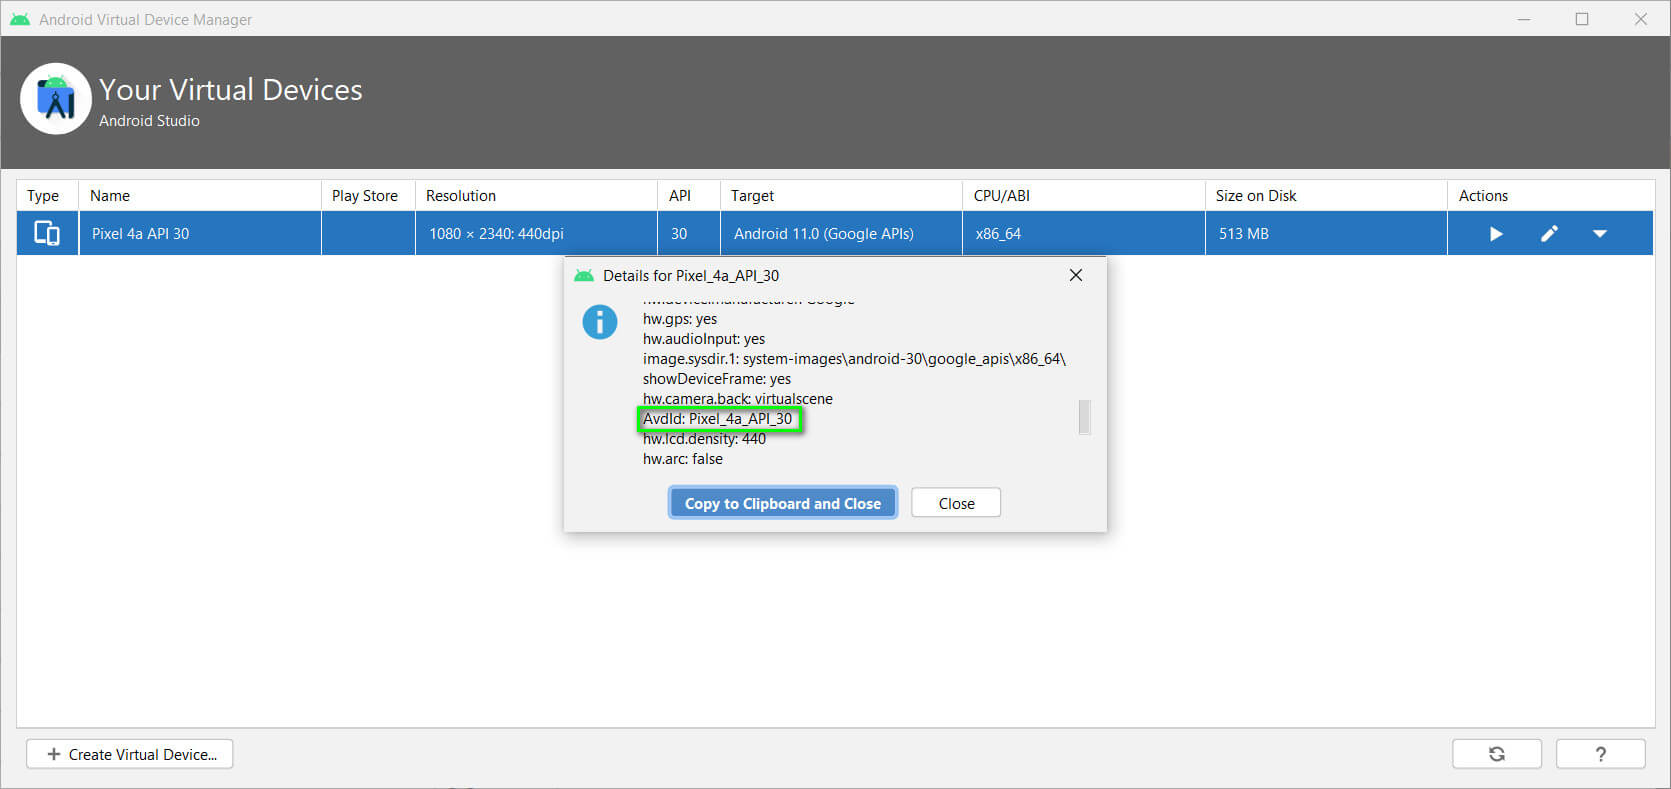
Now what we are left with is the AVD Id of the emulator. For that, go back to AVD Manager and click on the carrot symbol on the right and click on view details from the drop-down list.
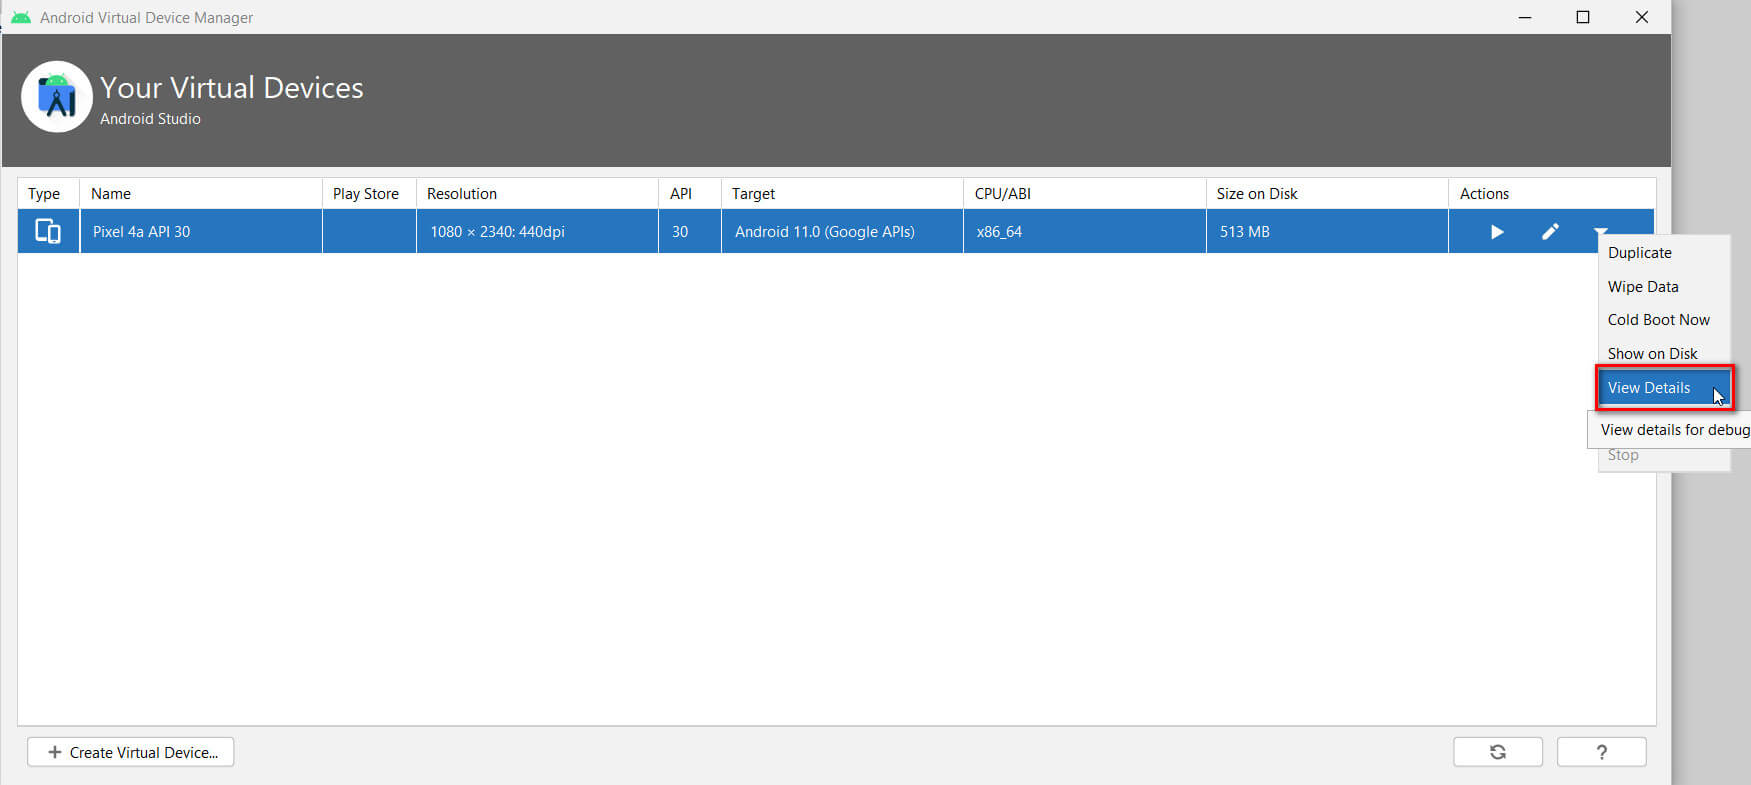
Details dialogue box of your emulator will get open. Scroll down till you find AvdId.
Now we the three important parameters required for creating the Scriptworks run settings info. We can proceed:
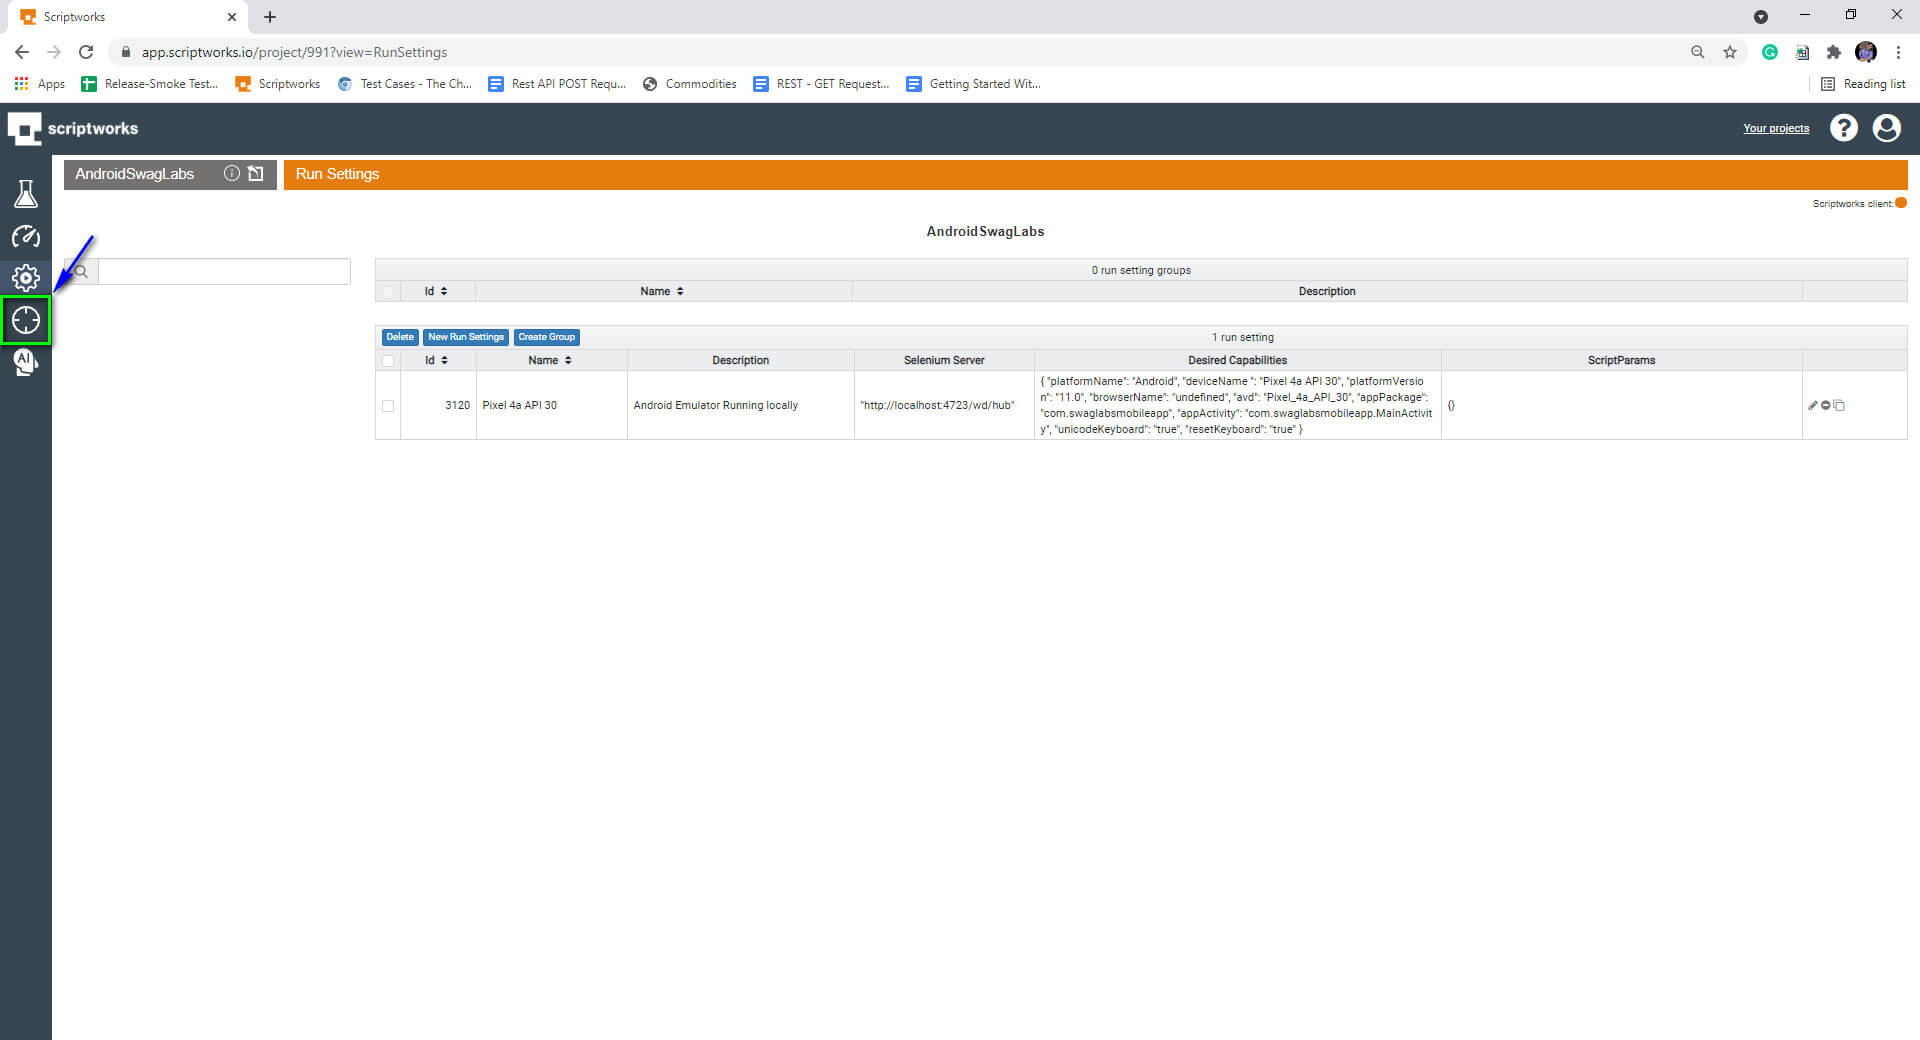
8) Let’s create the Scriptworks Run Settings info.
To do that, Navigate to scriptworks.io and log in with your credentials.
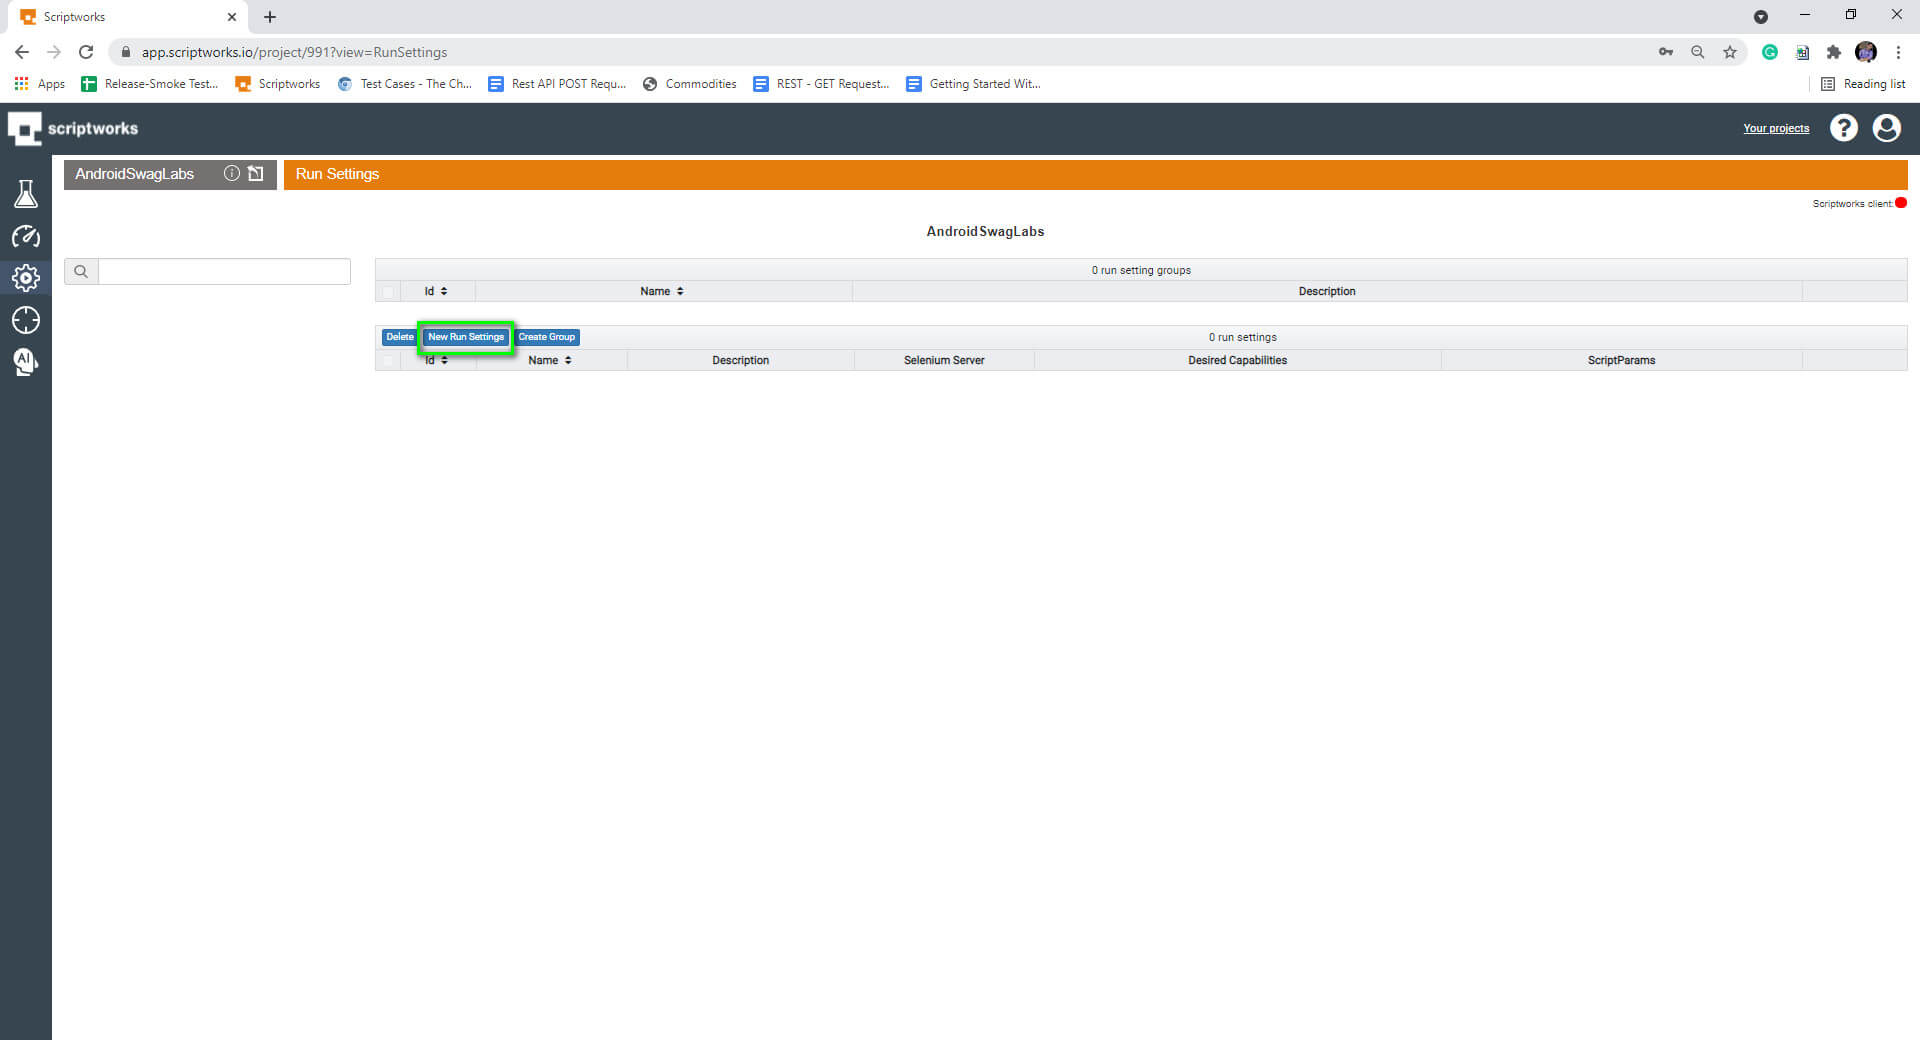
Then Navigate to your project and click on Cog Icon on the left-hand side.
![]()
Click on New Run Settings button.
And fill in the required info in the Run Settings info dialogue box.
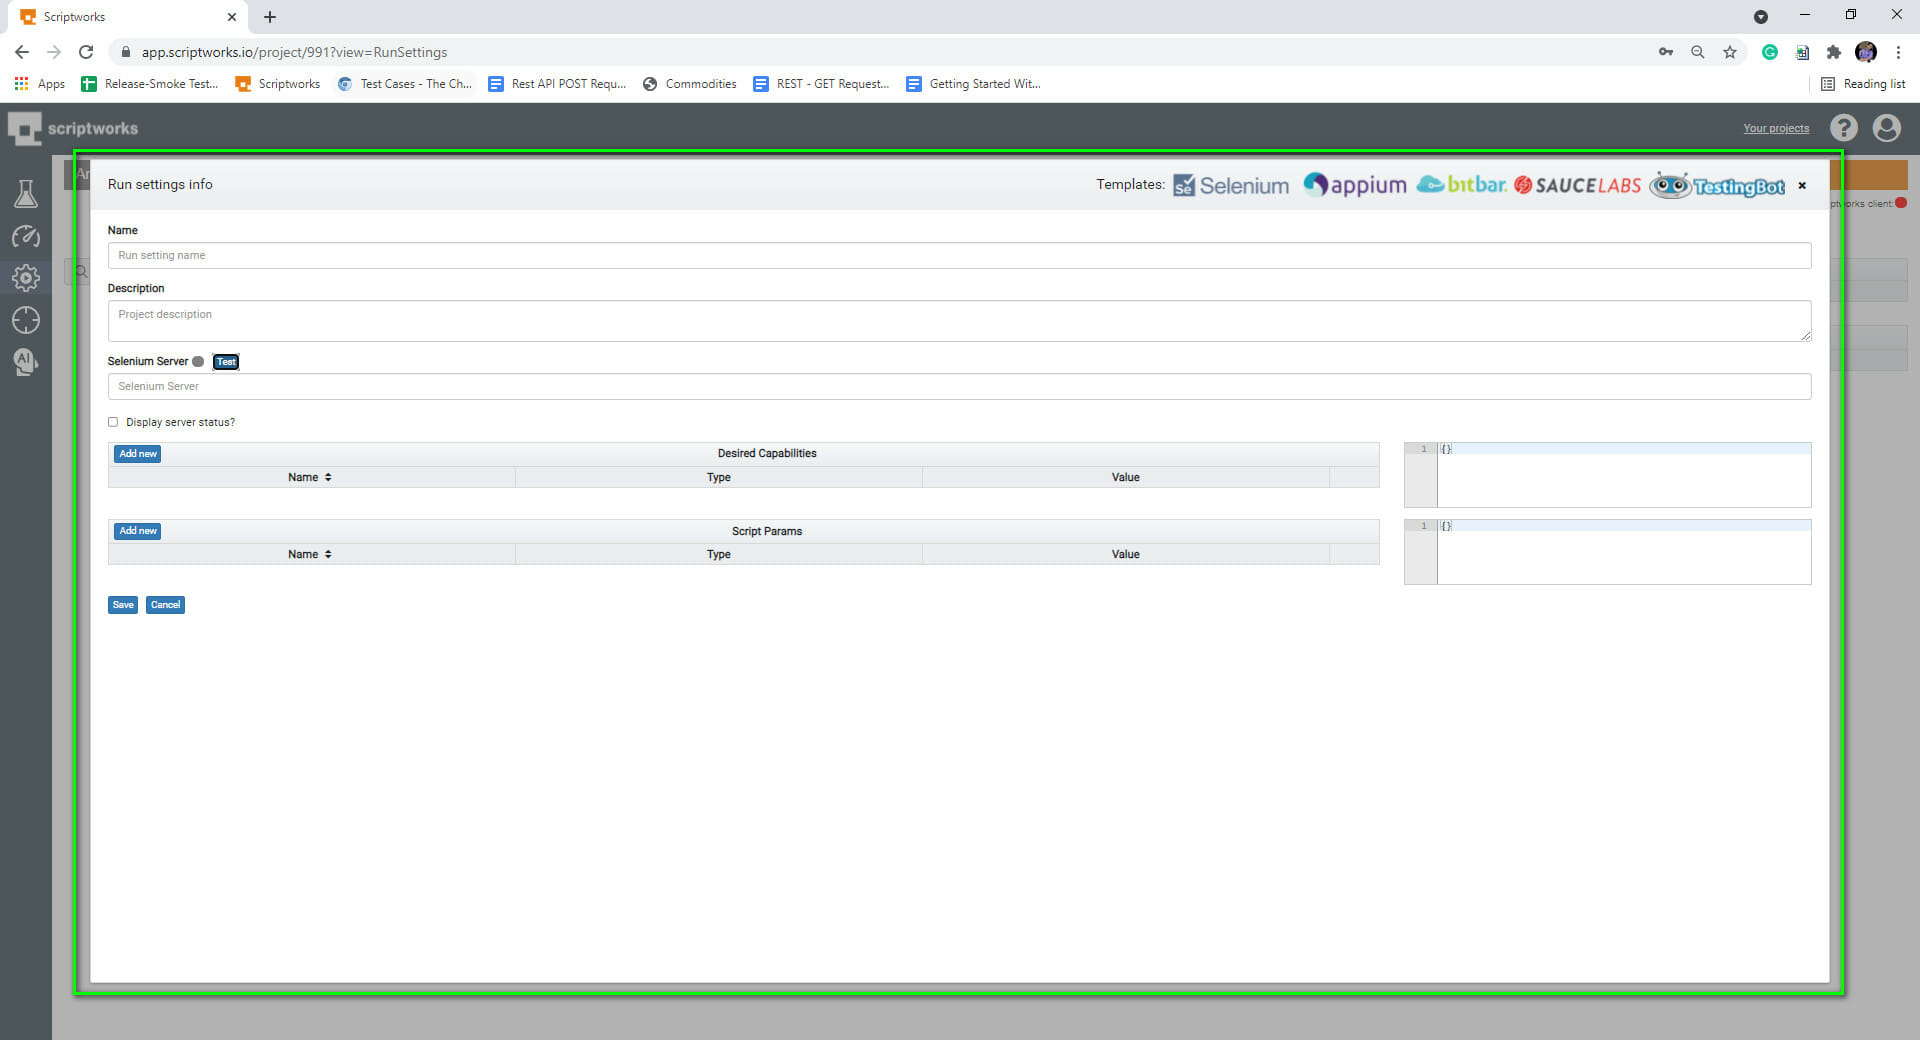
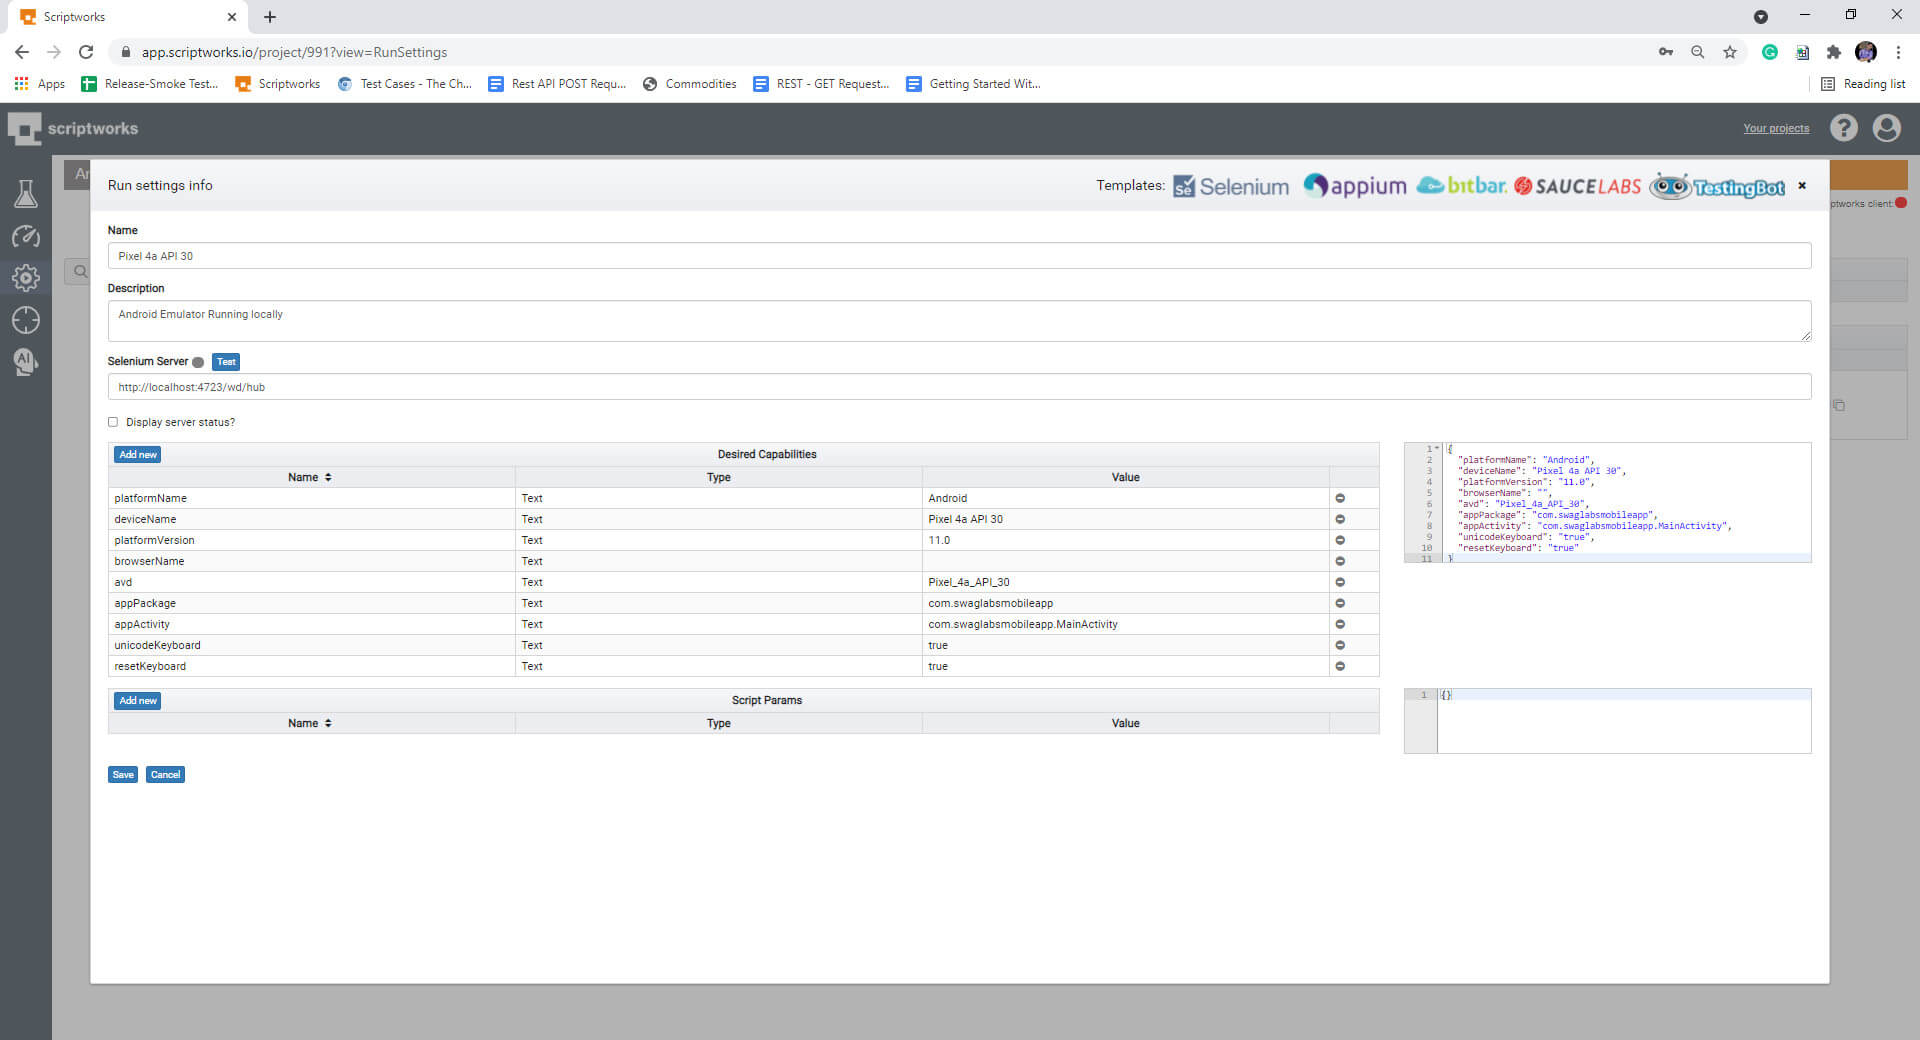
Let’s name this Run setting as “Pixel 4a API 30” the same name as the emulator present in Virtual Devices in Android Studio.
After that Give a suitable description like “Android Emulator Running Locally”
Then Enter Selenium Server:- http://localhost:4723/wd/hub which will actually be the local Appium Server this time for testing a mobile application under test.
Now Click on Add new and fill in details as shown below:-

Hint - The JSON section on the right hand side can be edited directly by cutting and pasting the following:
{
  "platformName": "Android",
  "deviceName ": "Pixel 4a API 30",
  "platformVersion": "11.0",
  "browserName": "",
  "avd": "Pixel_4a_API_30",
  "appPackage": "com.swaglabsmobileapp",
  "appActivity": "com.swaglabsmobileapp.MainActivity",
  "unicodeKeyboard": "true",
  "resetKeyboard": "true"
}
Hit Save to update the values in the Desired capabilities.
Now start scriptworks-client in your command prompt as shown below:-
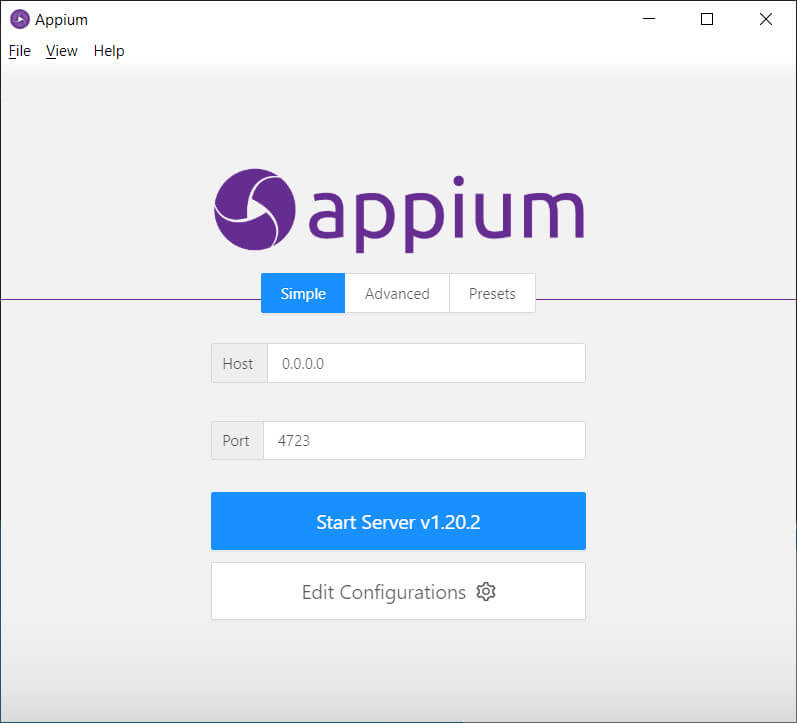
Now Start the Appium Server:

Click on the Test Button beside Selenium server in the Scriptworks run settings info to validate whether the connection between Scriptworks and the Appium server has been made successfully or not?
A Status Request will be shown in the Appium Log:
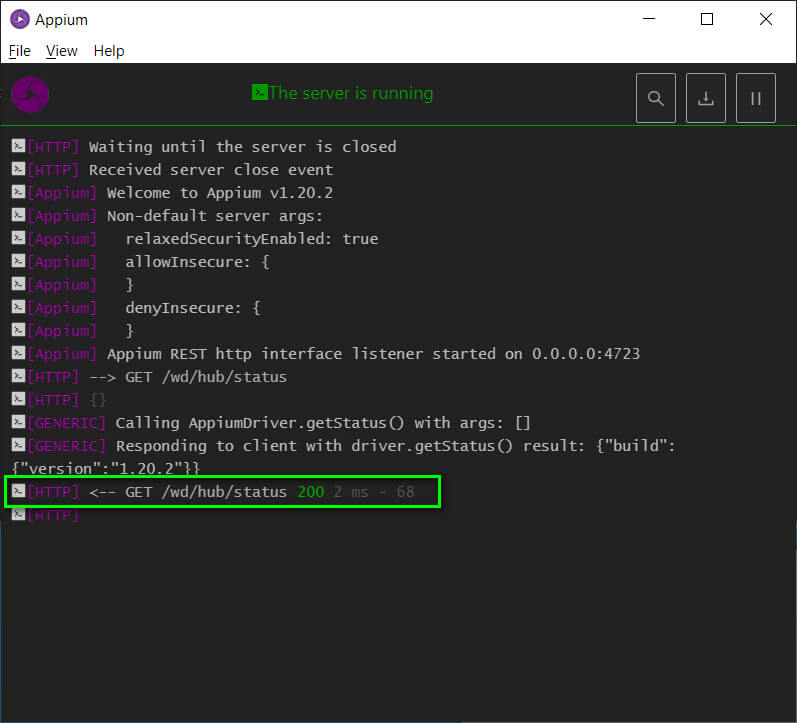
And the light should show green if connection is successful:
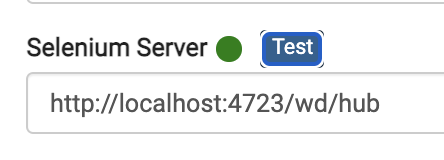
If the Light shows red, please check the previous steps have been performed successfully and all components are started correctly.
Click on the save button to save the run settings.
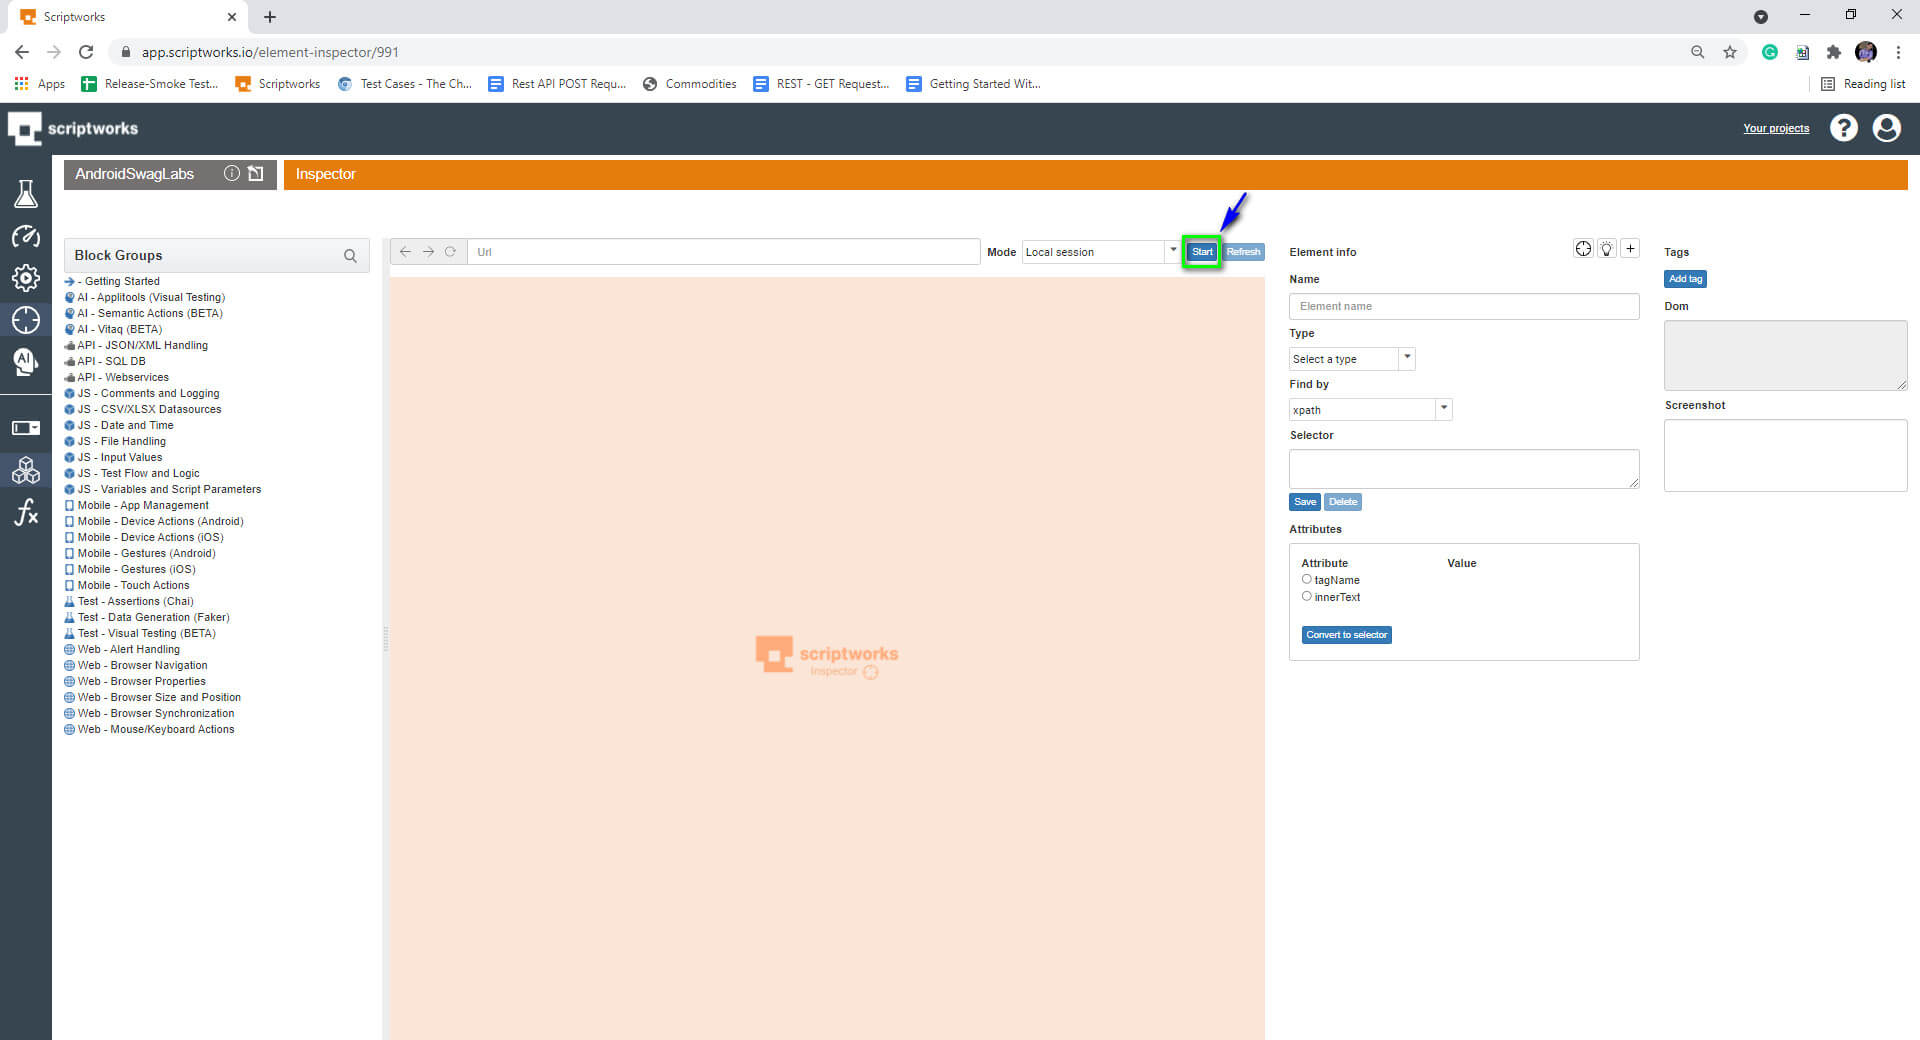
9) Now click on the target symbol to go to Scriptworks inspector and click on the mode drop-down to select local session.
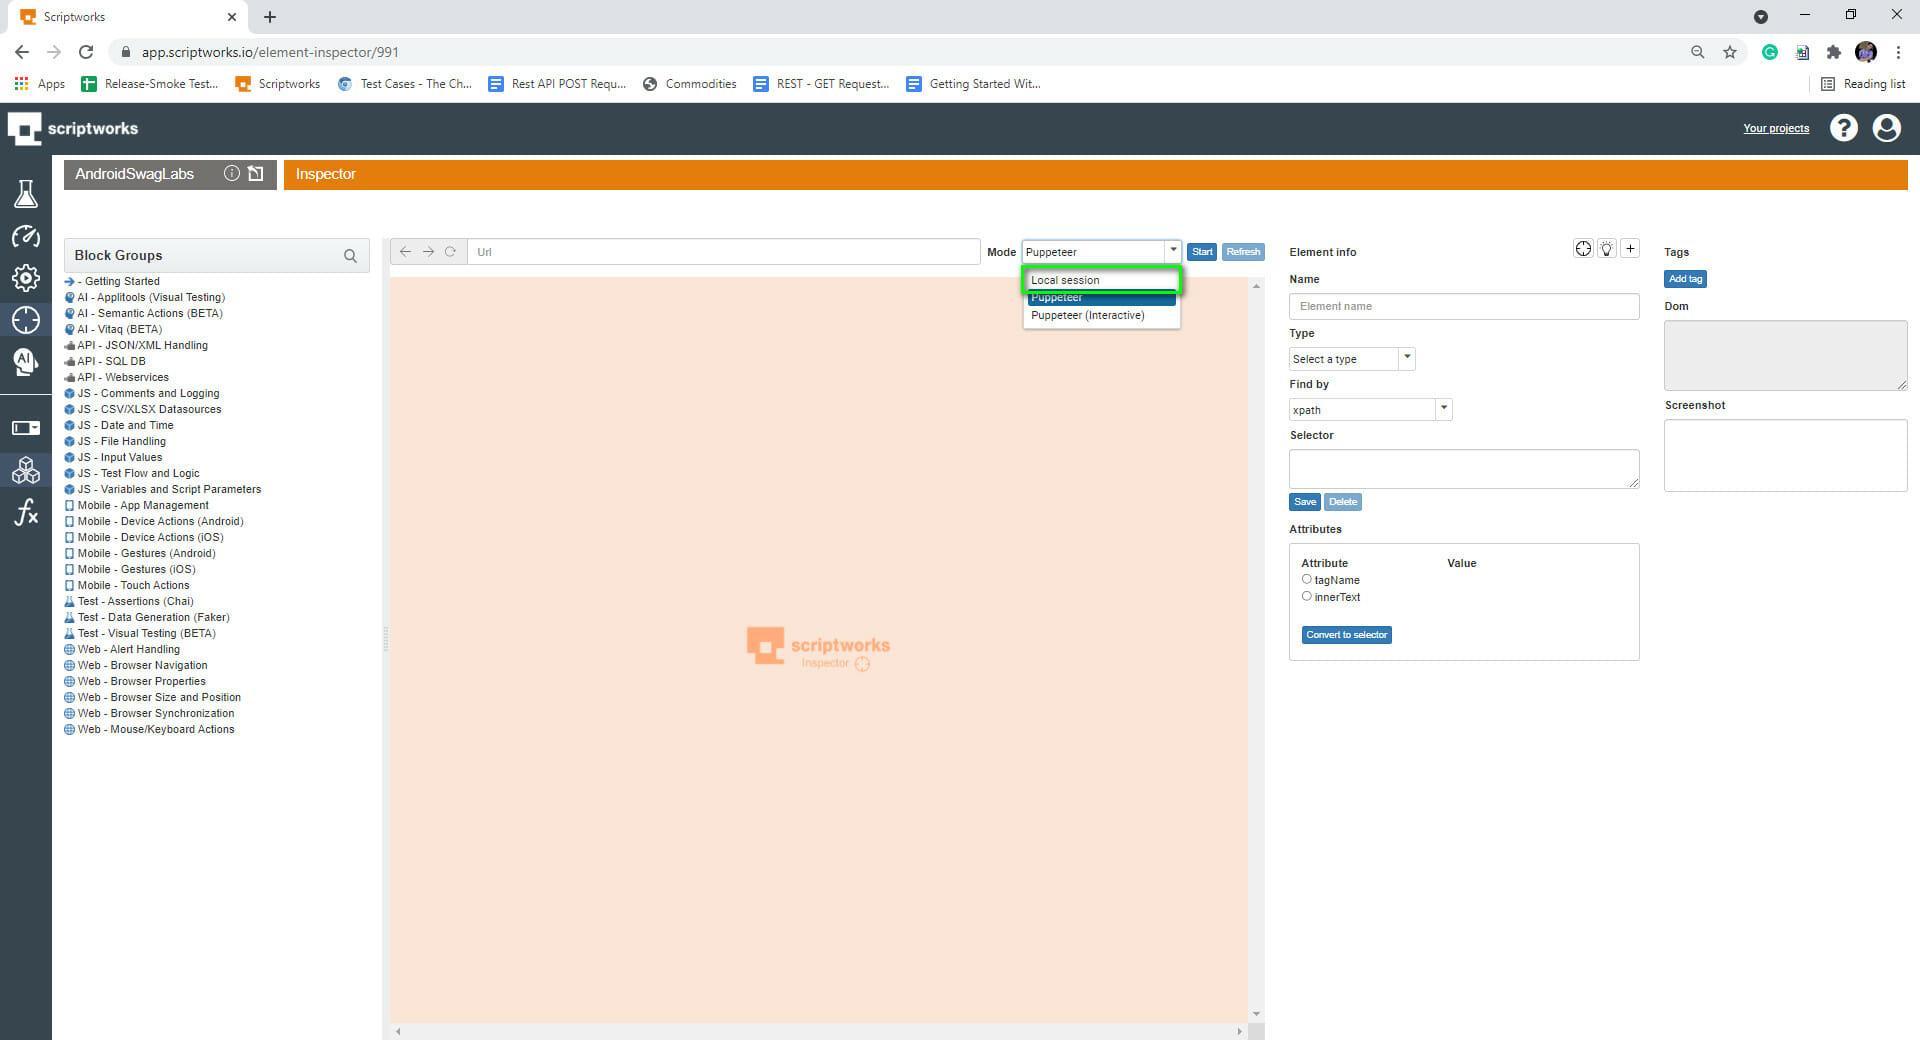
Click on Start Button
Select the Pixel 4a API 30 entry from the "Select run settings to run session with" dialog and the application under test should launch in the Emulator and a screenshot display in the Inspector as shown below:
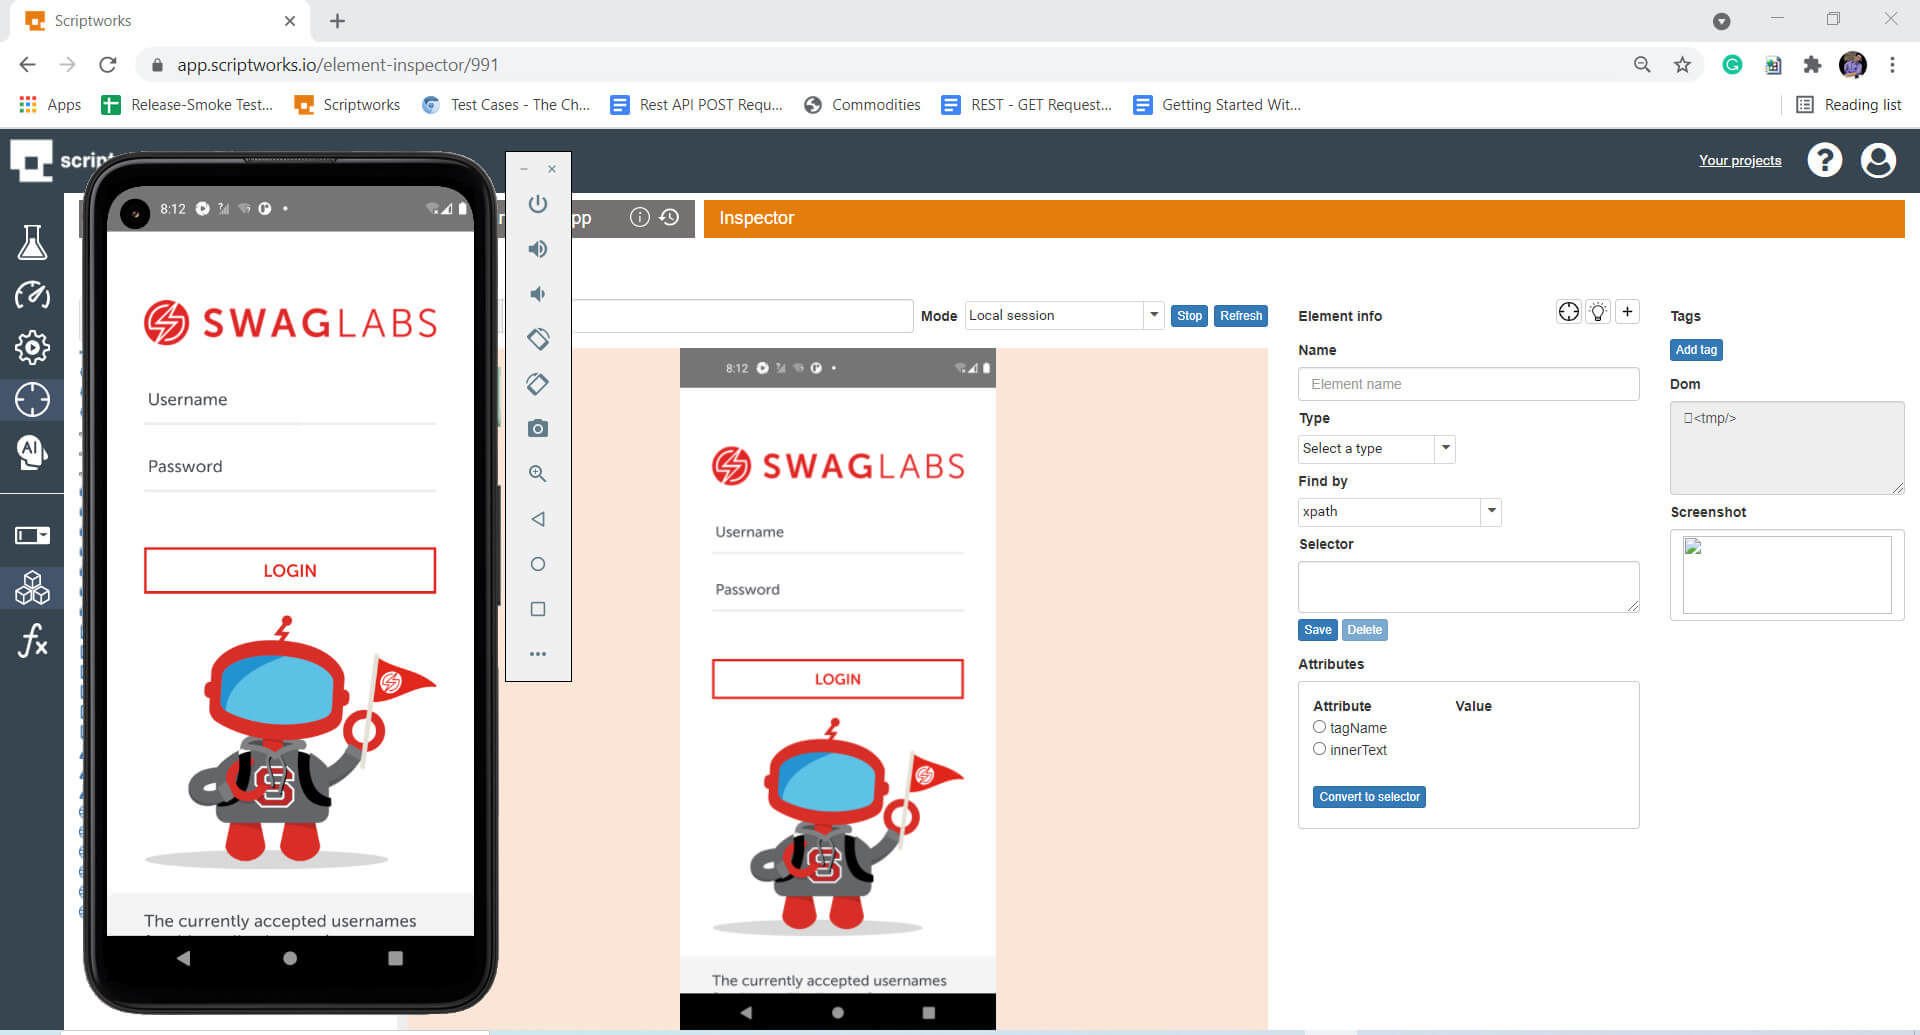
If the screenshot is blank hit the Refresh button on the Inspector dialog to grab a fresh screenshot.
This is how after setting up Android Studio, Appium and Scriptworks our Windows machine, we can Inspect a Native Android application on the Emulator using Scriptworks.